Giant Jenga

This ‘Tumble Tower’ project was simply for me and my family/friends.. But since I made this set,  I have been asked to make more…

I once saw a picture of this game, and thought that is so simple yet effective, Adults can enjoy this as much as the kids.   I bought some 3″ x 2″ CLS (Canadian Lumber Standard) construction timber. It has the corners eased (nicely rounded) I ran all lengths through my thicknesser ensuring each piece was the exact same thickness (guaranteeing superb game play).

I measured the width, multiplied by three, and cut 69 pieces of this length. selecting a 6mm ’round over’ router bit  I rounded ALL the sharp edges.  Then sanded each piece on all sides with fine grit sandpaper.  Then hand polished with a beeswax/carnauba wax composite… twice.   Better finished than shop bought.

We really have had loads of fun with this game.. and there will be more to come.   And occasionally we let the kids play too.

Porch Refit

Replacing the rotten timber.

I was approached to see if I could save the life of an old timber built porch.

It certainly looked very sad. The tongue and groove panelling was rotten to the core and some pieces crumbled to dust as I crushed them in my hand. The frame at the base on the porch front was rotten and had fractured, allowing the porch to pull away an inch or so from its original position. Some of the beading in the windows was either missing or rotten. The barge board by the roof edge had suffered some rot, but in the main was sound.  The muntin between the glazing at points had rotted somewhat also. But all in all this porch was recoverable to serve many more years to come.

All the tongue and groove paneling required replacing, I manufactured quadrant beading to match, which was mitred and fitted in place. I manufactured a replacement frame base to replace the rotten section  beneath the front doors. As I pulled the frame together to secure the frame to the floor, the doors started binding. These were eased and rehung, and the door bolts were repositioned new weatherboards were manufactured for the doors. Once the doors were rehung, the alignment was as new and the door gently clicked shut.  The rotten muntin was cut out and a new piece was spliced in, and I manufactured beading to match the existing original quadrant profile.

The rotten parts of the bargeboard were dug out, the area was treated with wood hardener and once dry, a two part epoxy wood filler was applied to fill flush to the surface.

Once the homeowner chooses a new colour to be painted, this previously tired and decrepit looking  porch will look virtually as new.   A pleasing overall result.


Garden Project

Traditional Decking

This was a series of projects built over time, to transform a garden space consisting of a concrete apron, concrete paving slabs, and a rough grassed area into a garden.

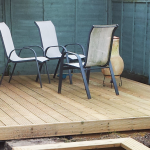
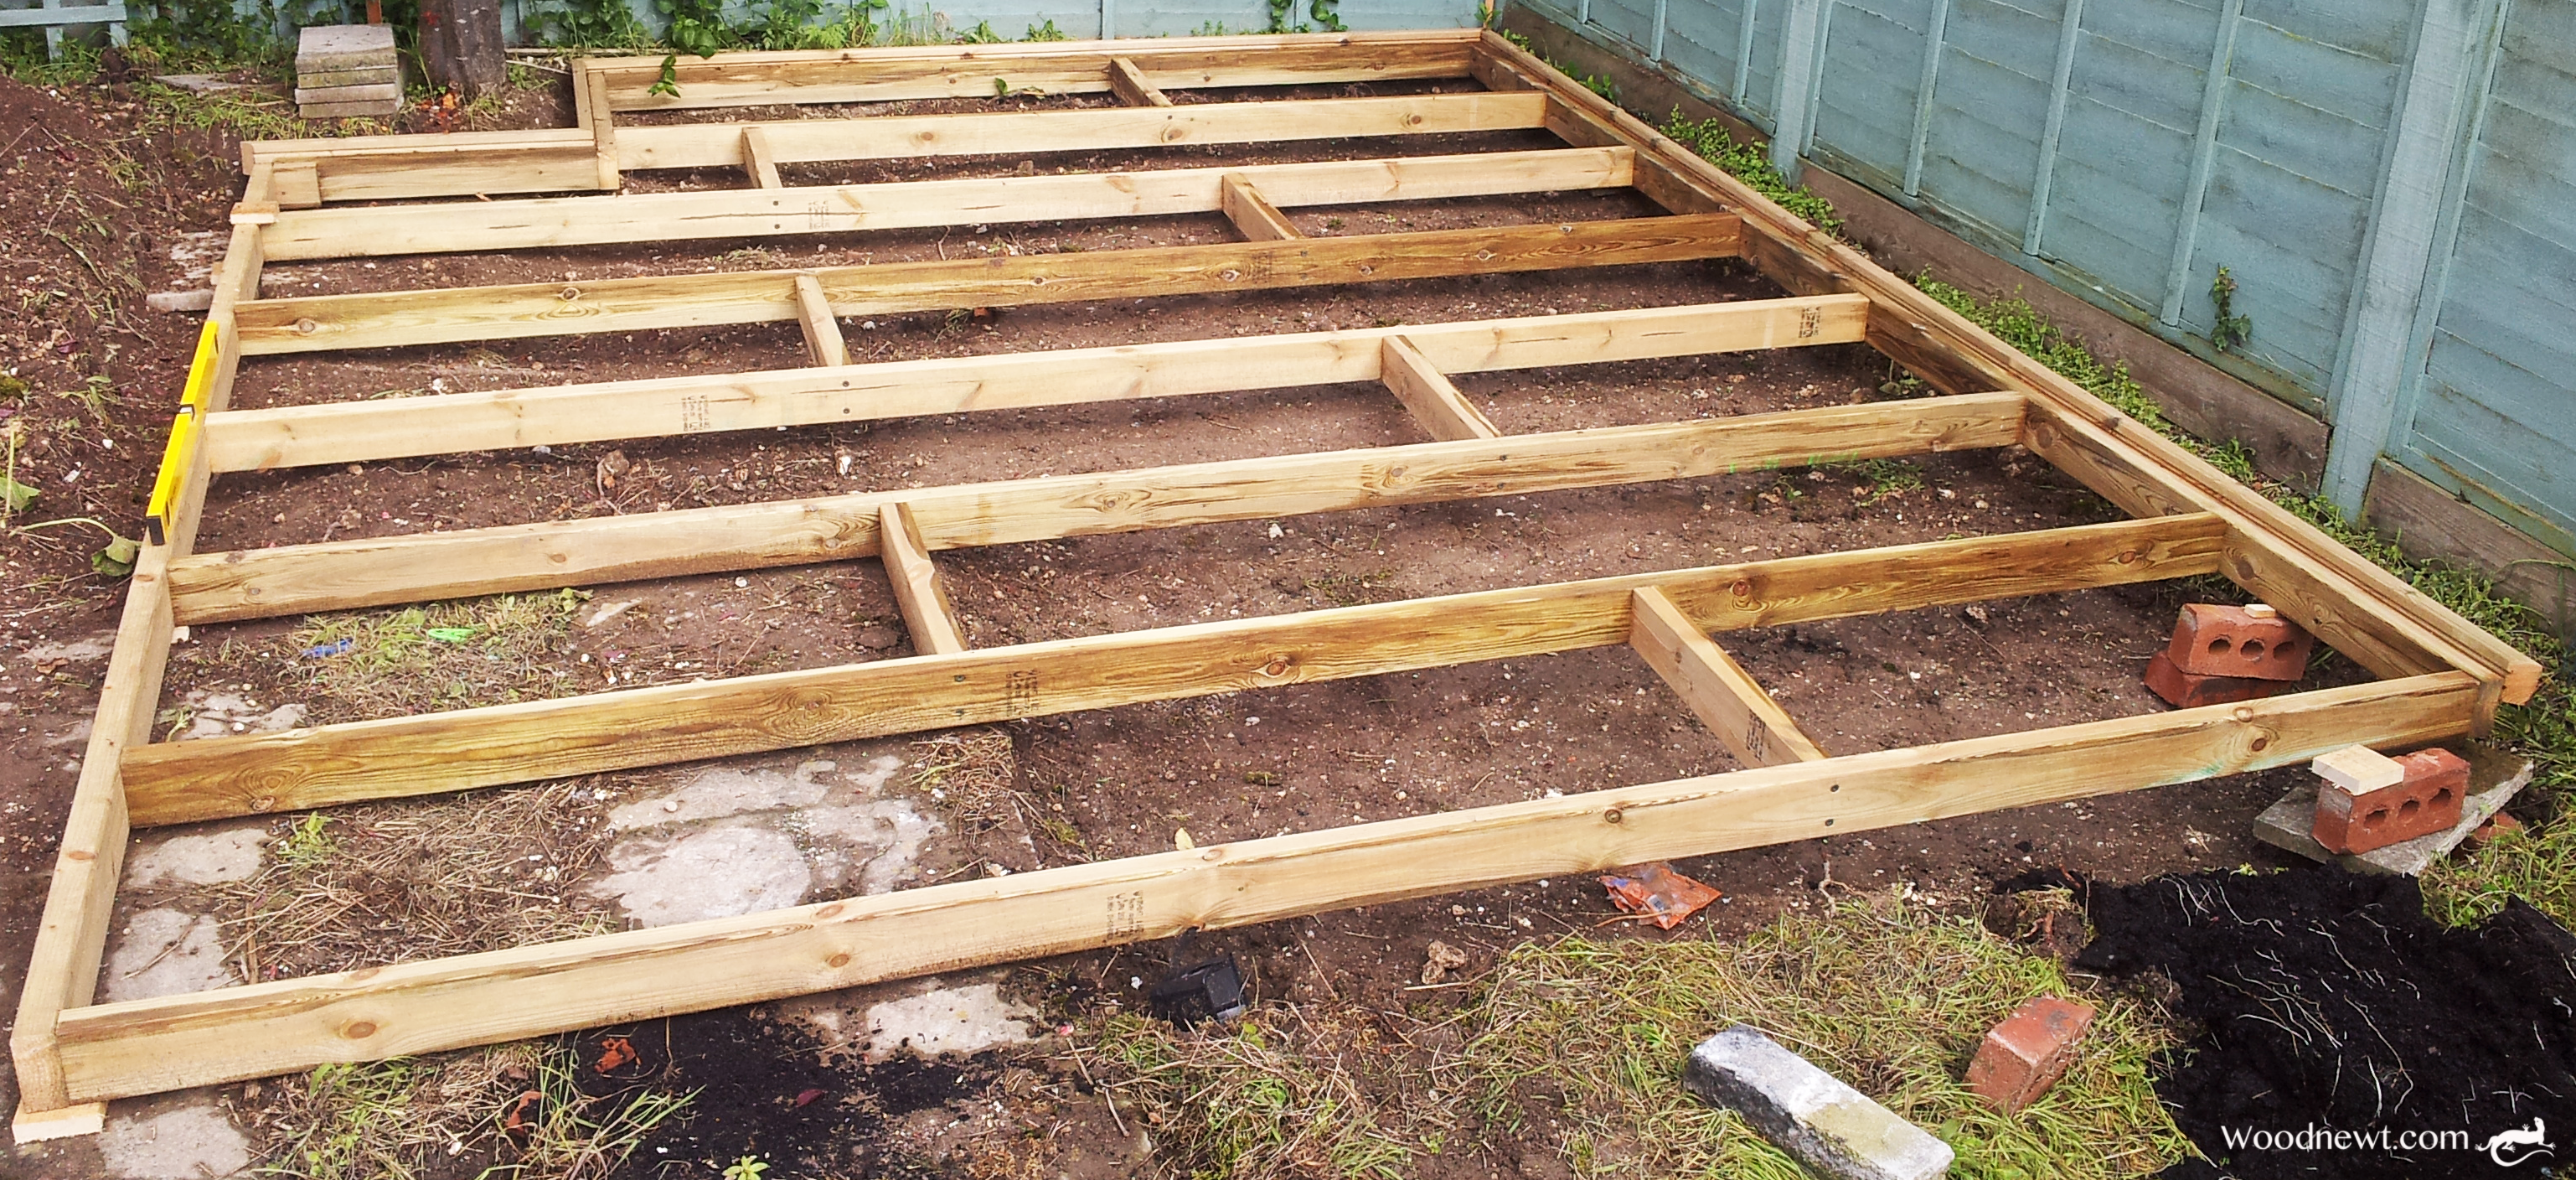
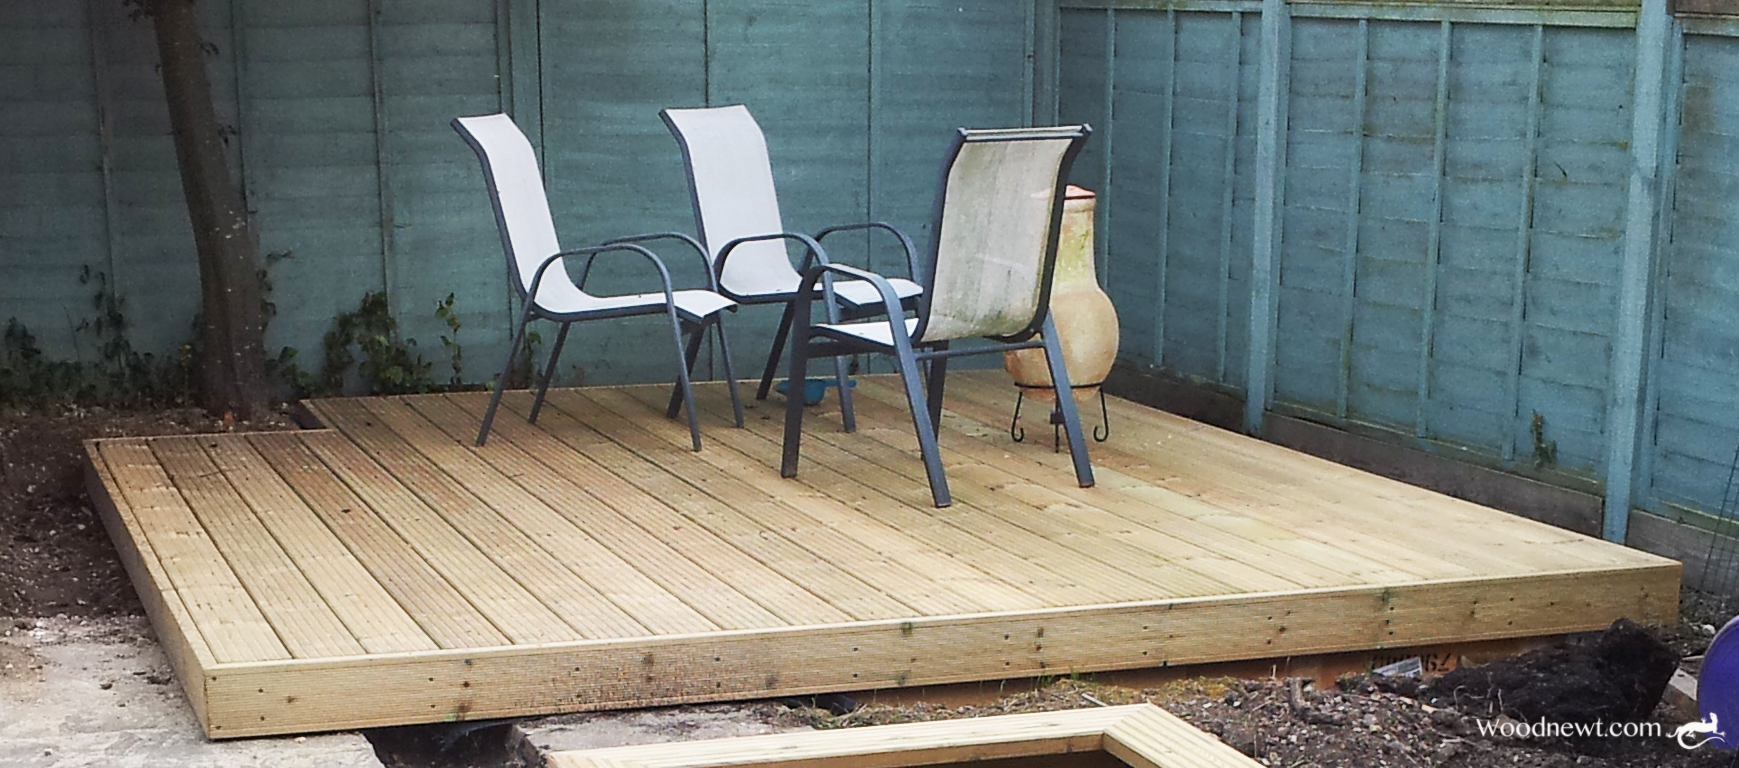
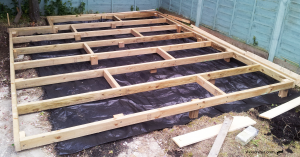
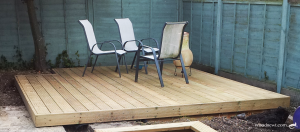
Despite the grassed area looking level, it needed about 10cm of earth removing to allow a 3.5m x 4m deck to be built at ground level. The earth was stored at the bottom of the garden, and would later be used to help fill the raised beds along with additional soil enhancer (compost)

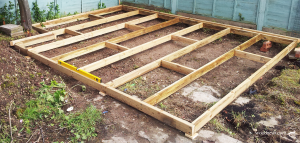
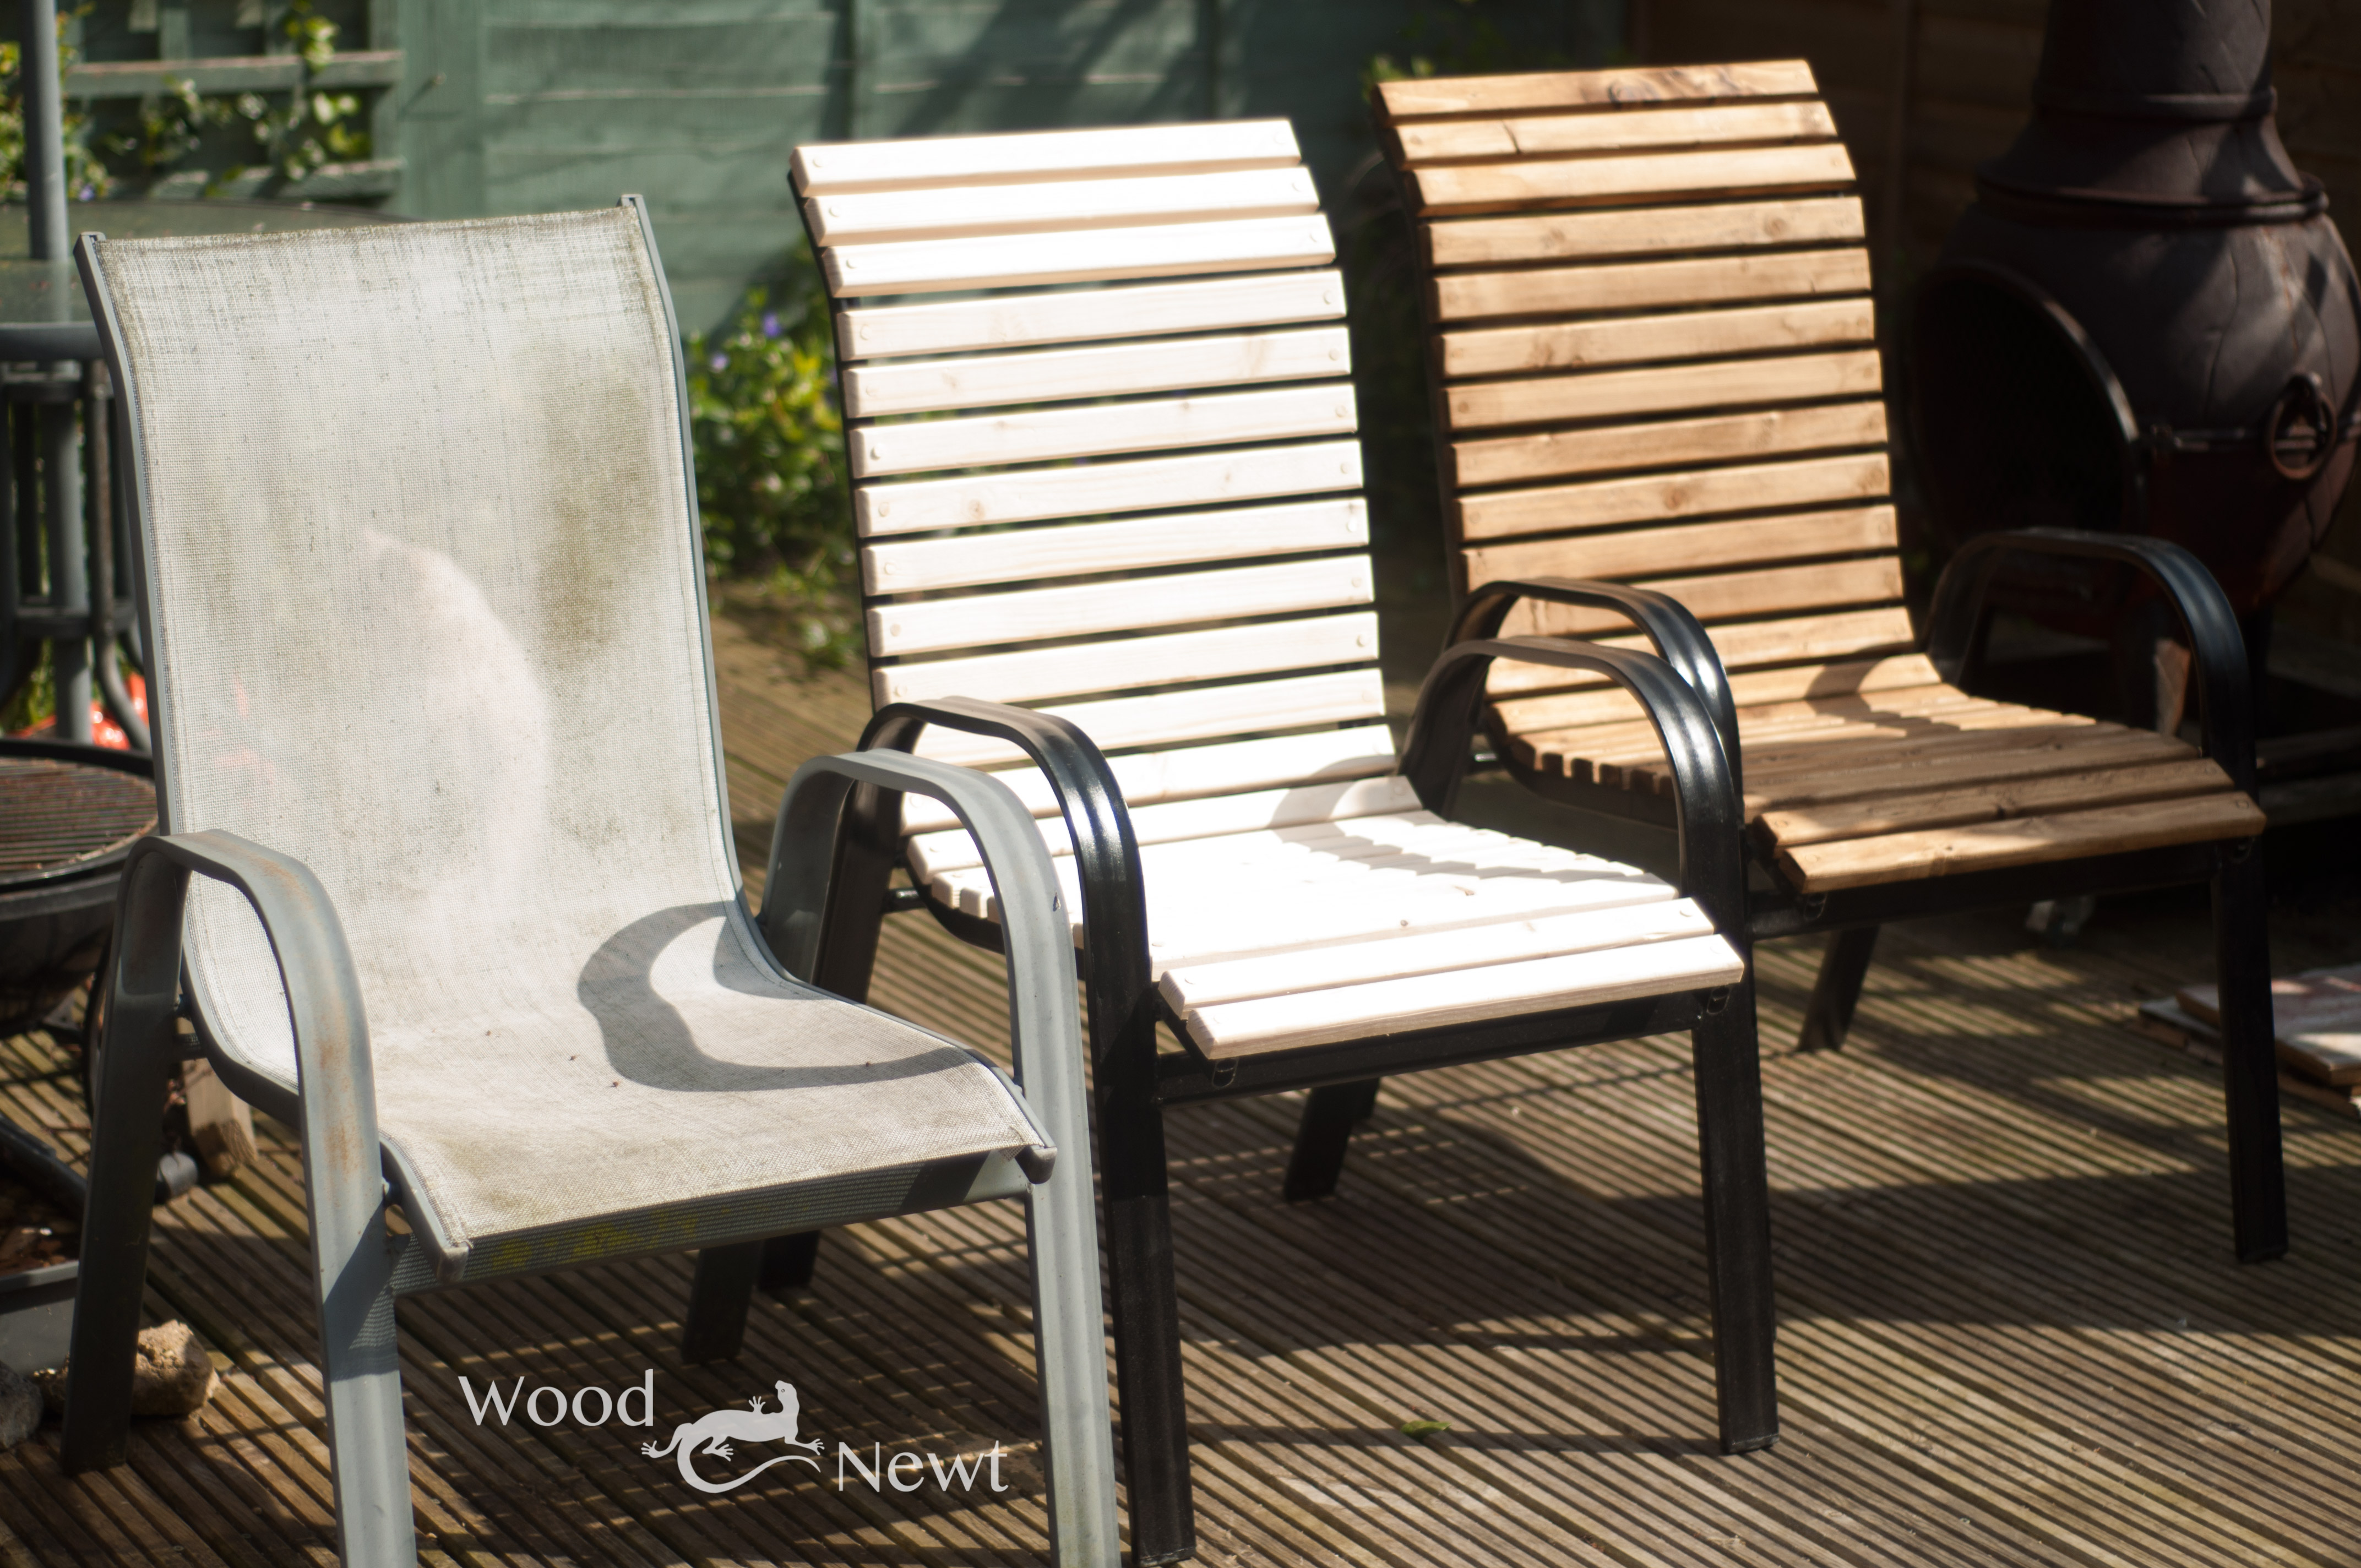
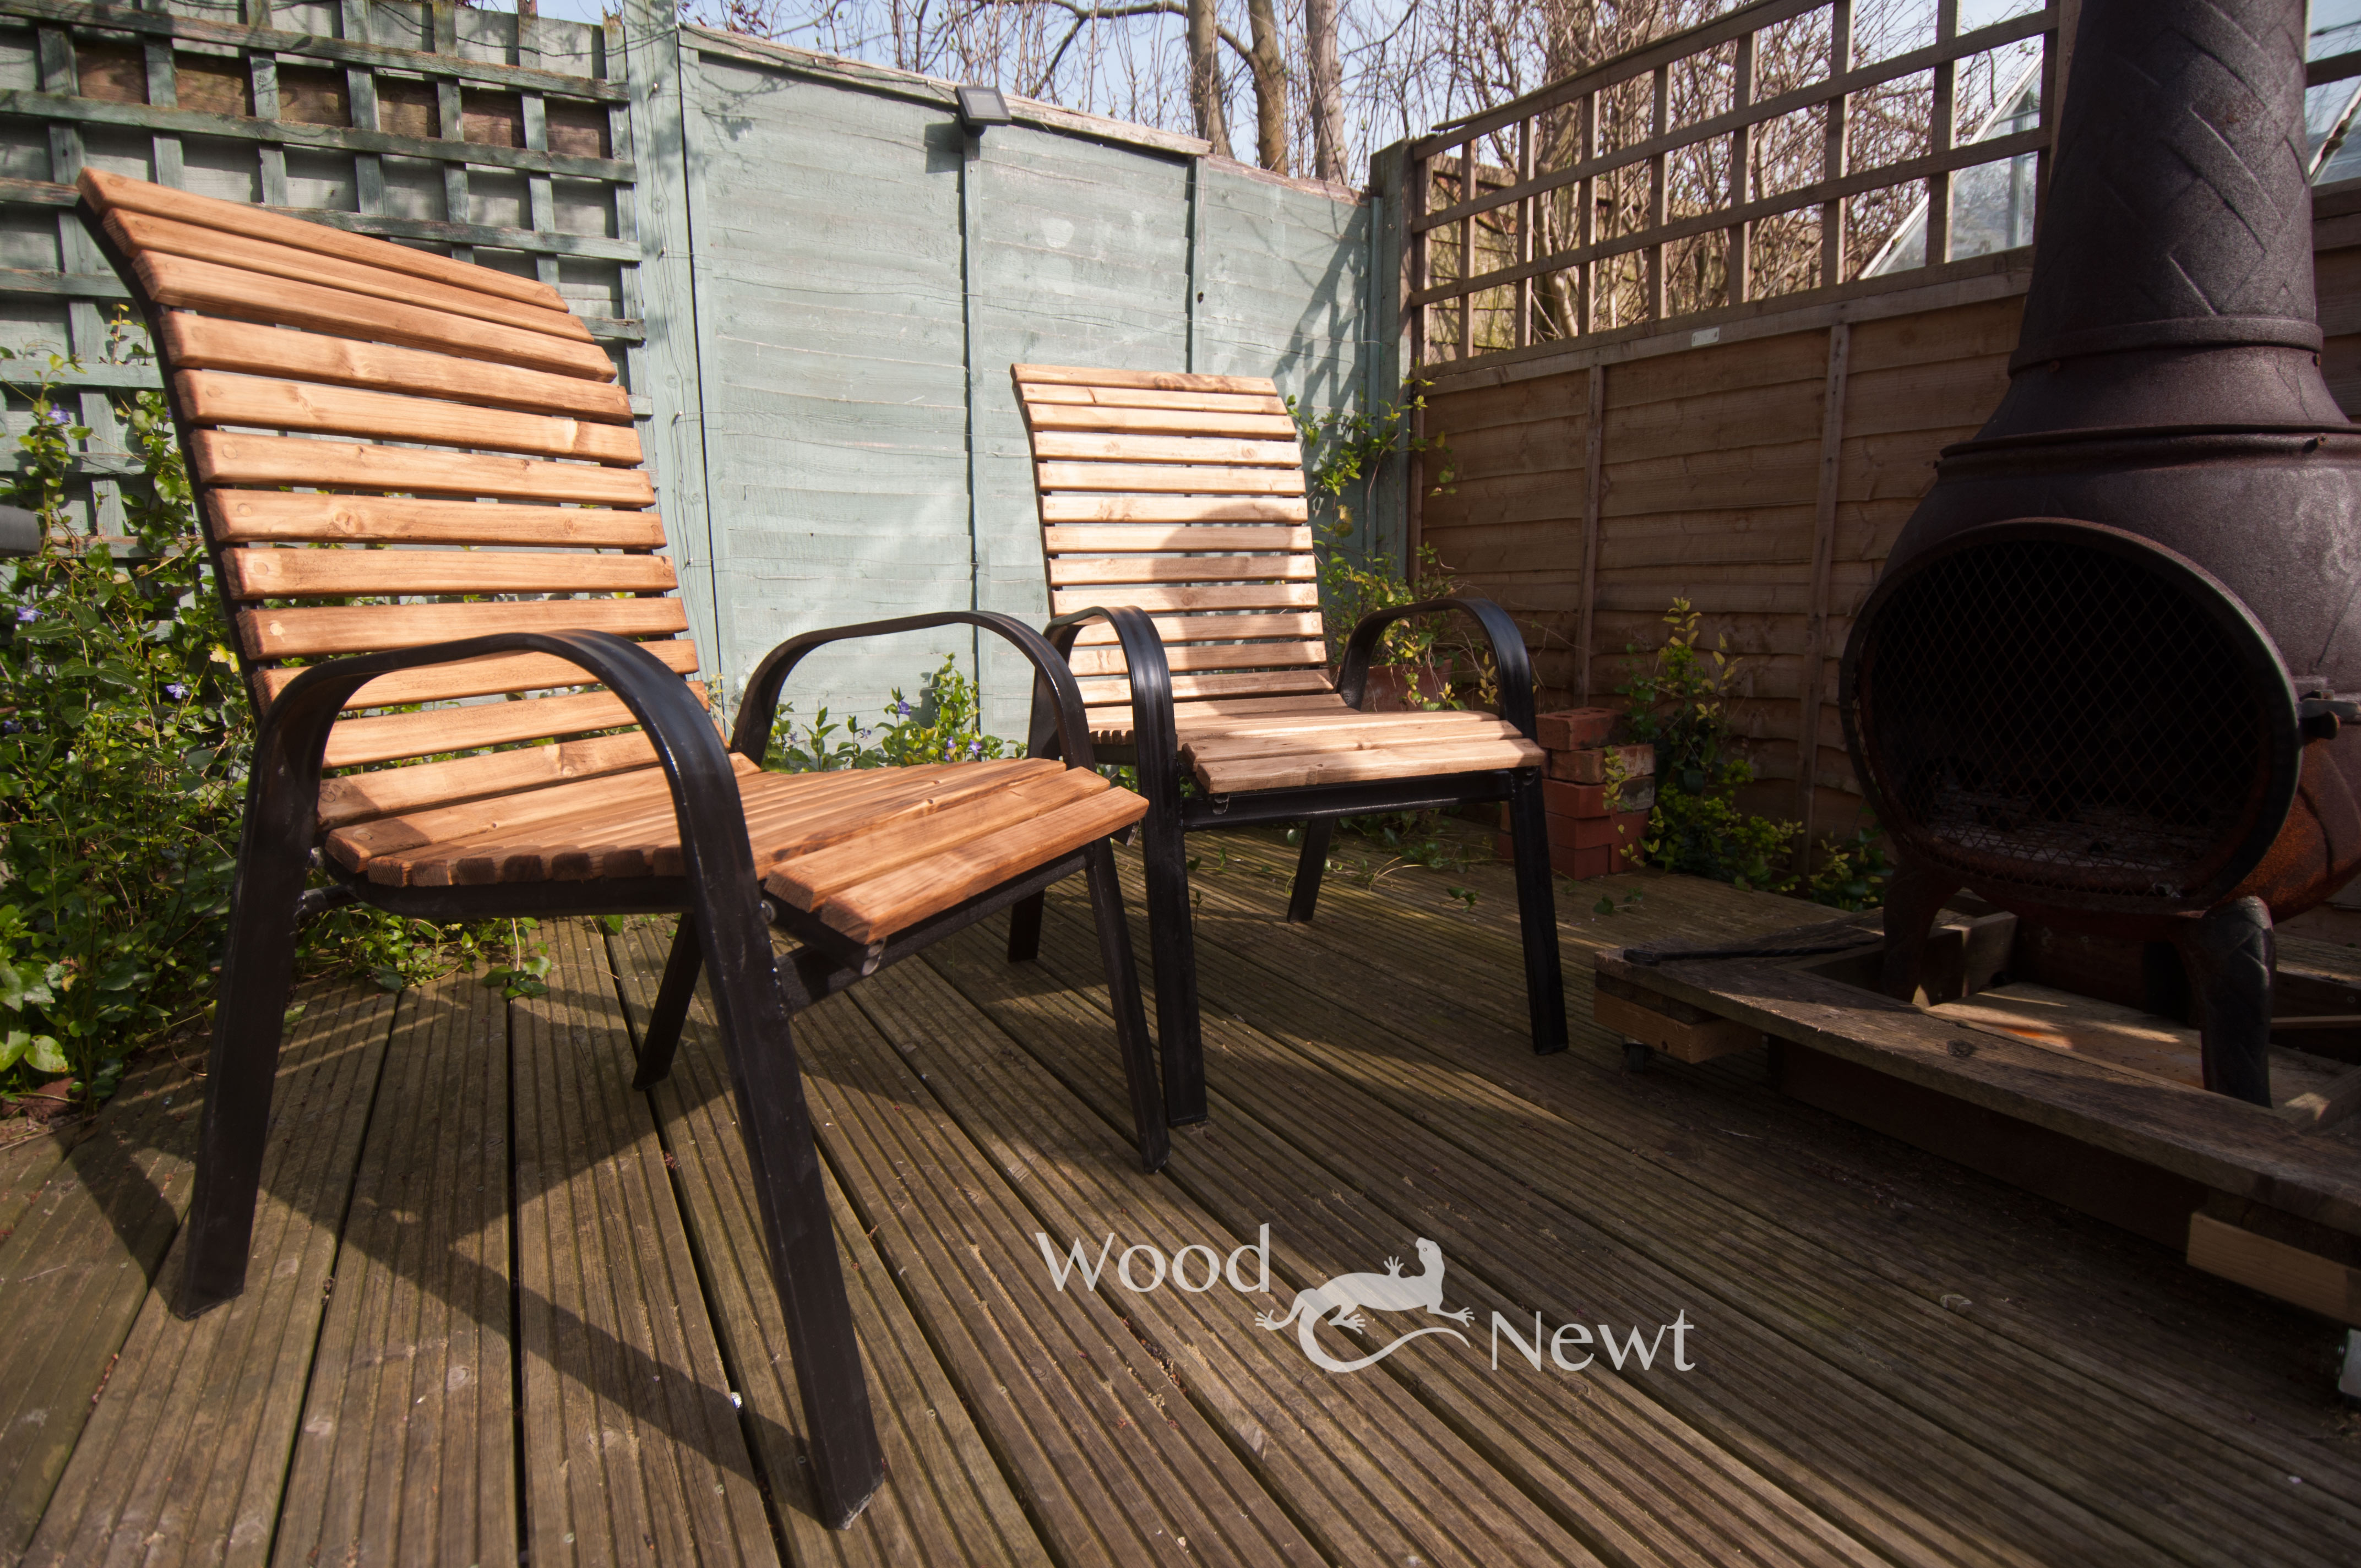
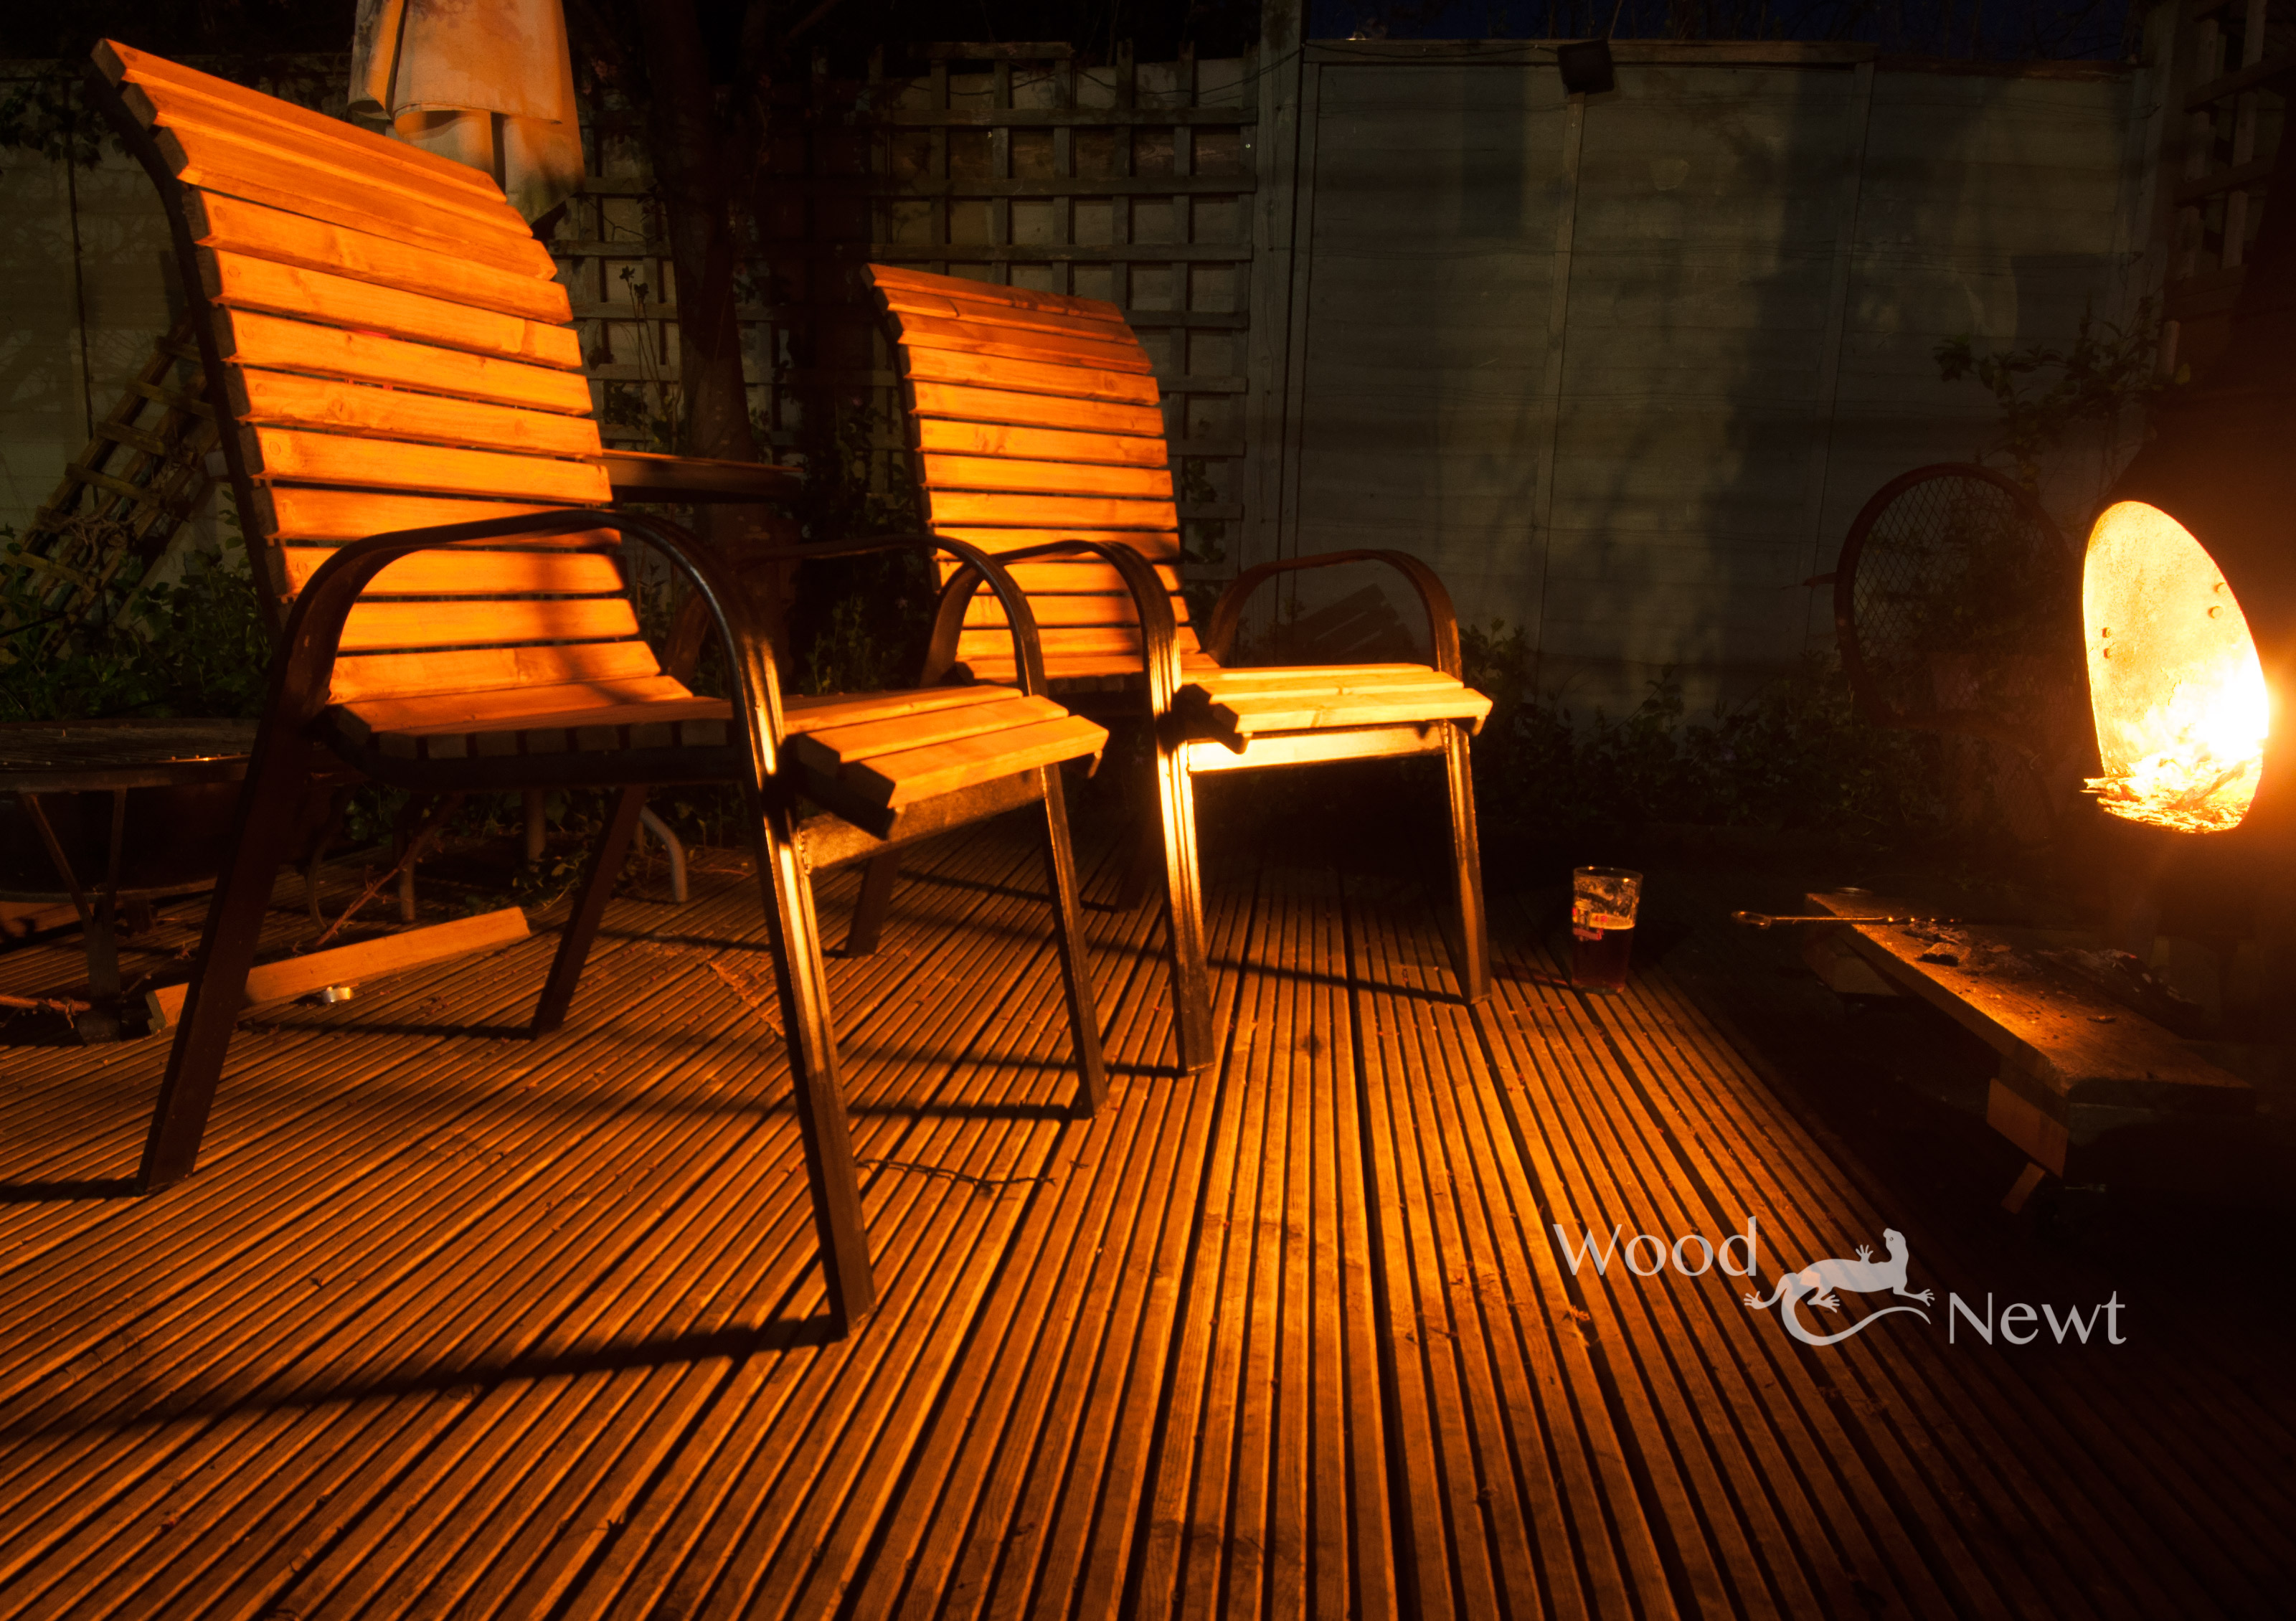
To maximise the size of the deck, it was built around the mature tree currently there.  The deck frame is made with 50mm x 100mm treated joists spaced at 500mm centres, this is topped with 125mm x 30mm deck-boards.

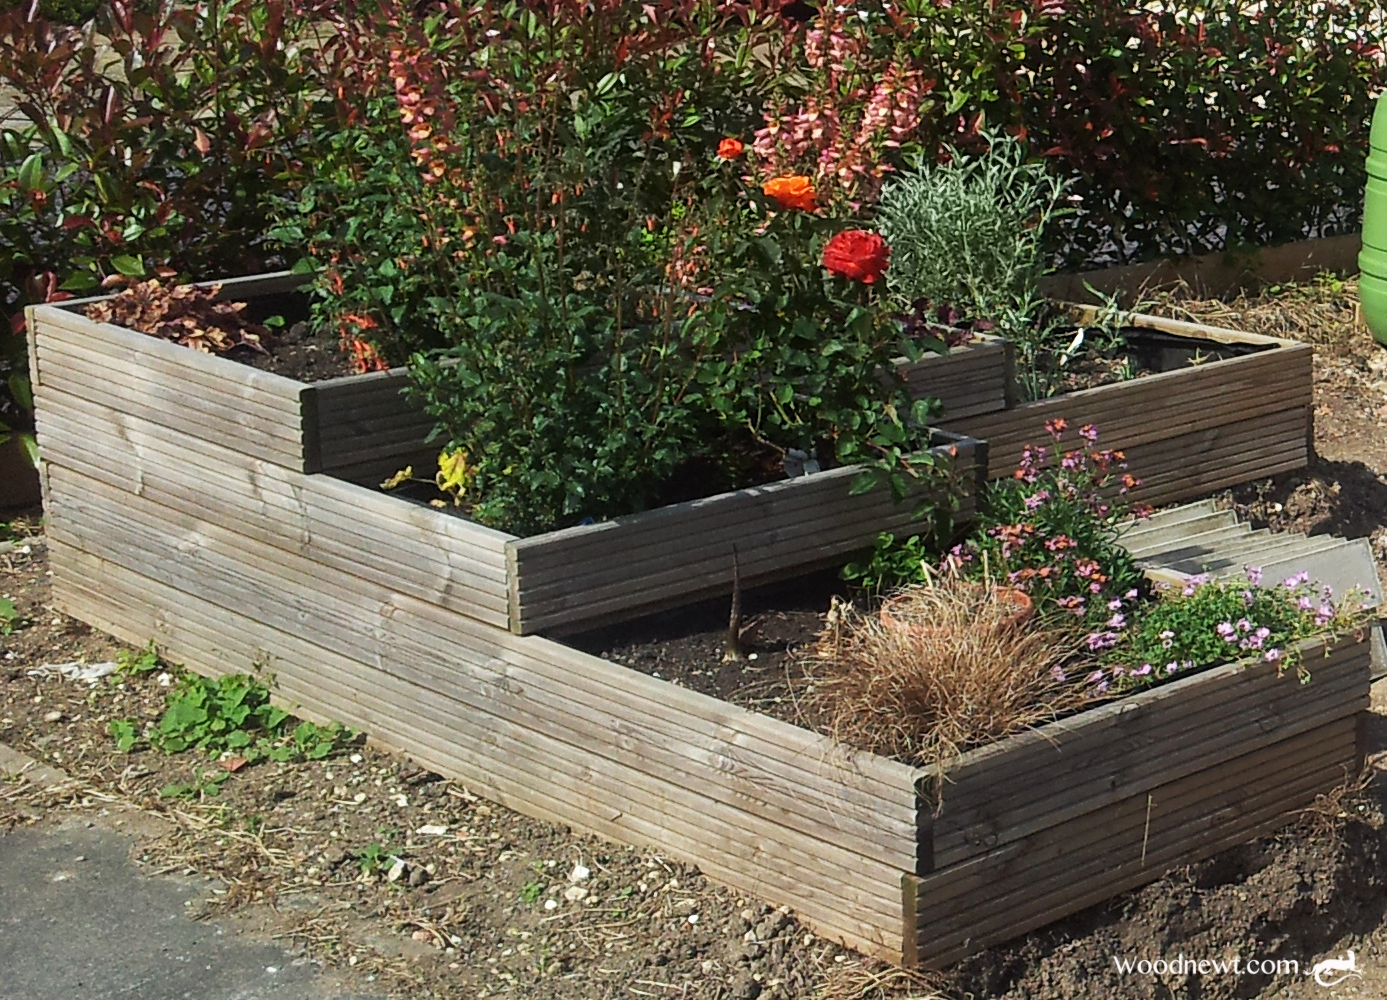
Further to the deck, garden space was asked for, I could have simply taken some of the paving slabs up to allow the homeowner to cultivate the soil beneath, but to accommodate some planting in pots, I suggested raised beds to allow different heights to structure and display the plants and flowers, allowing pots to be placed in front of the beds also.

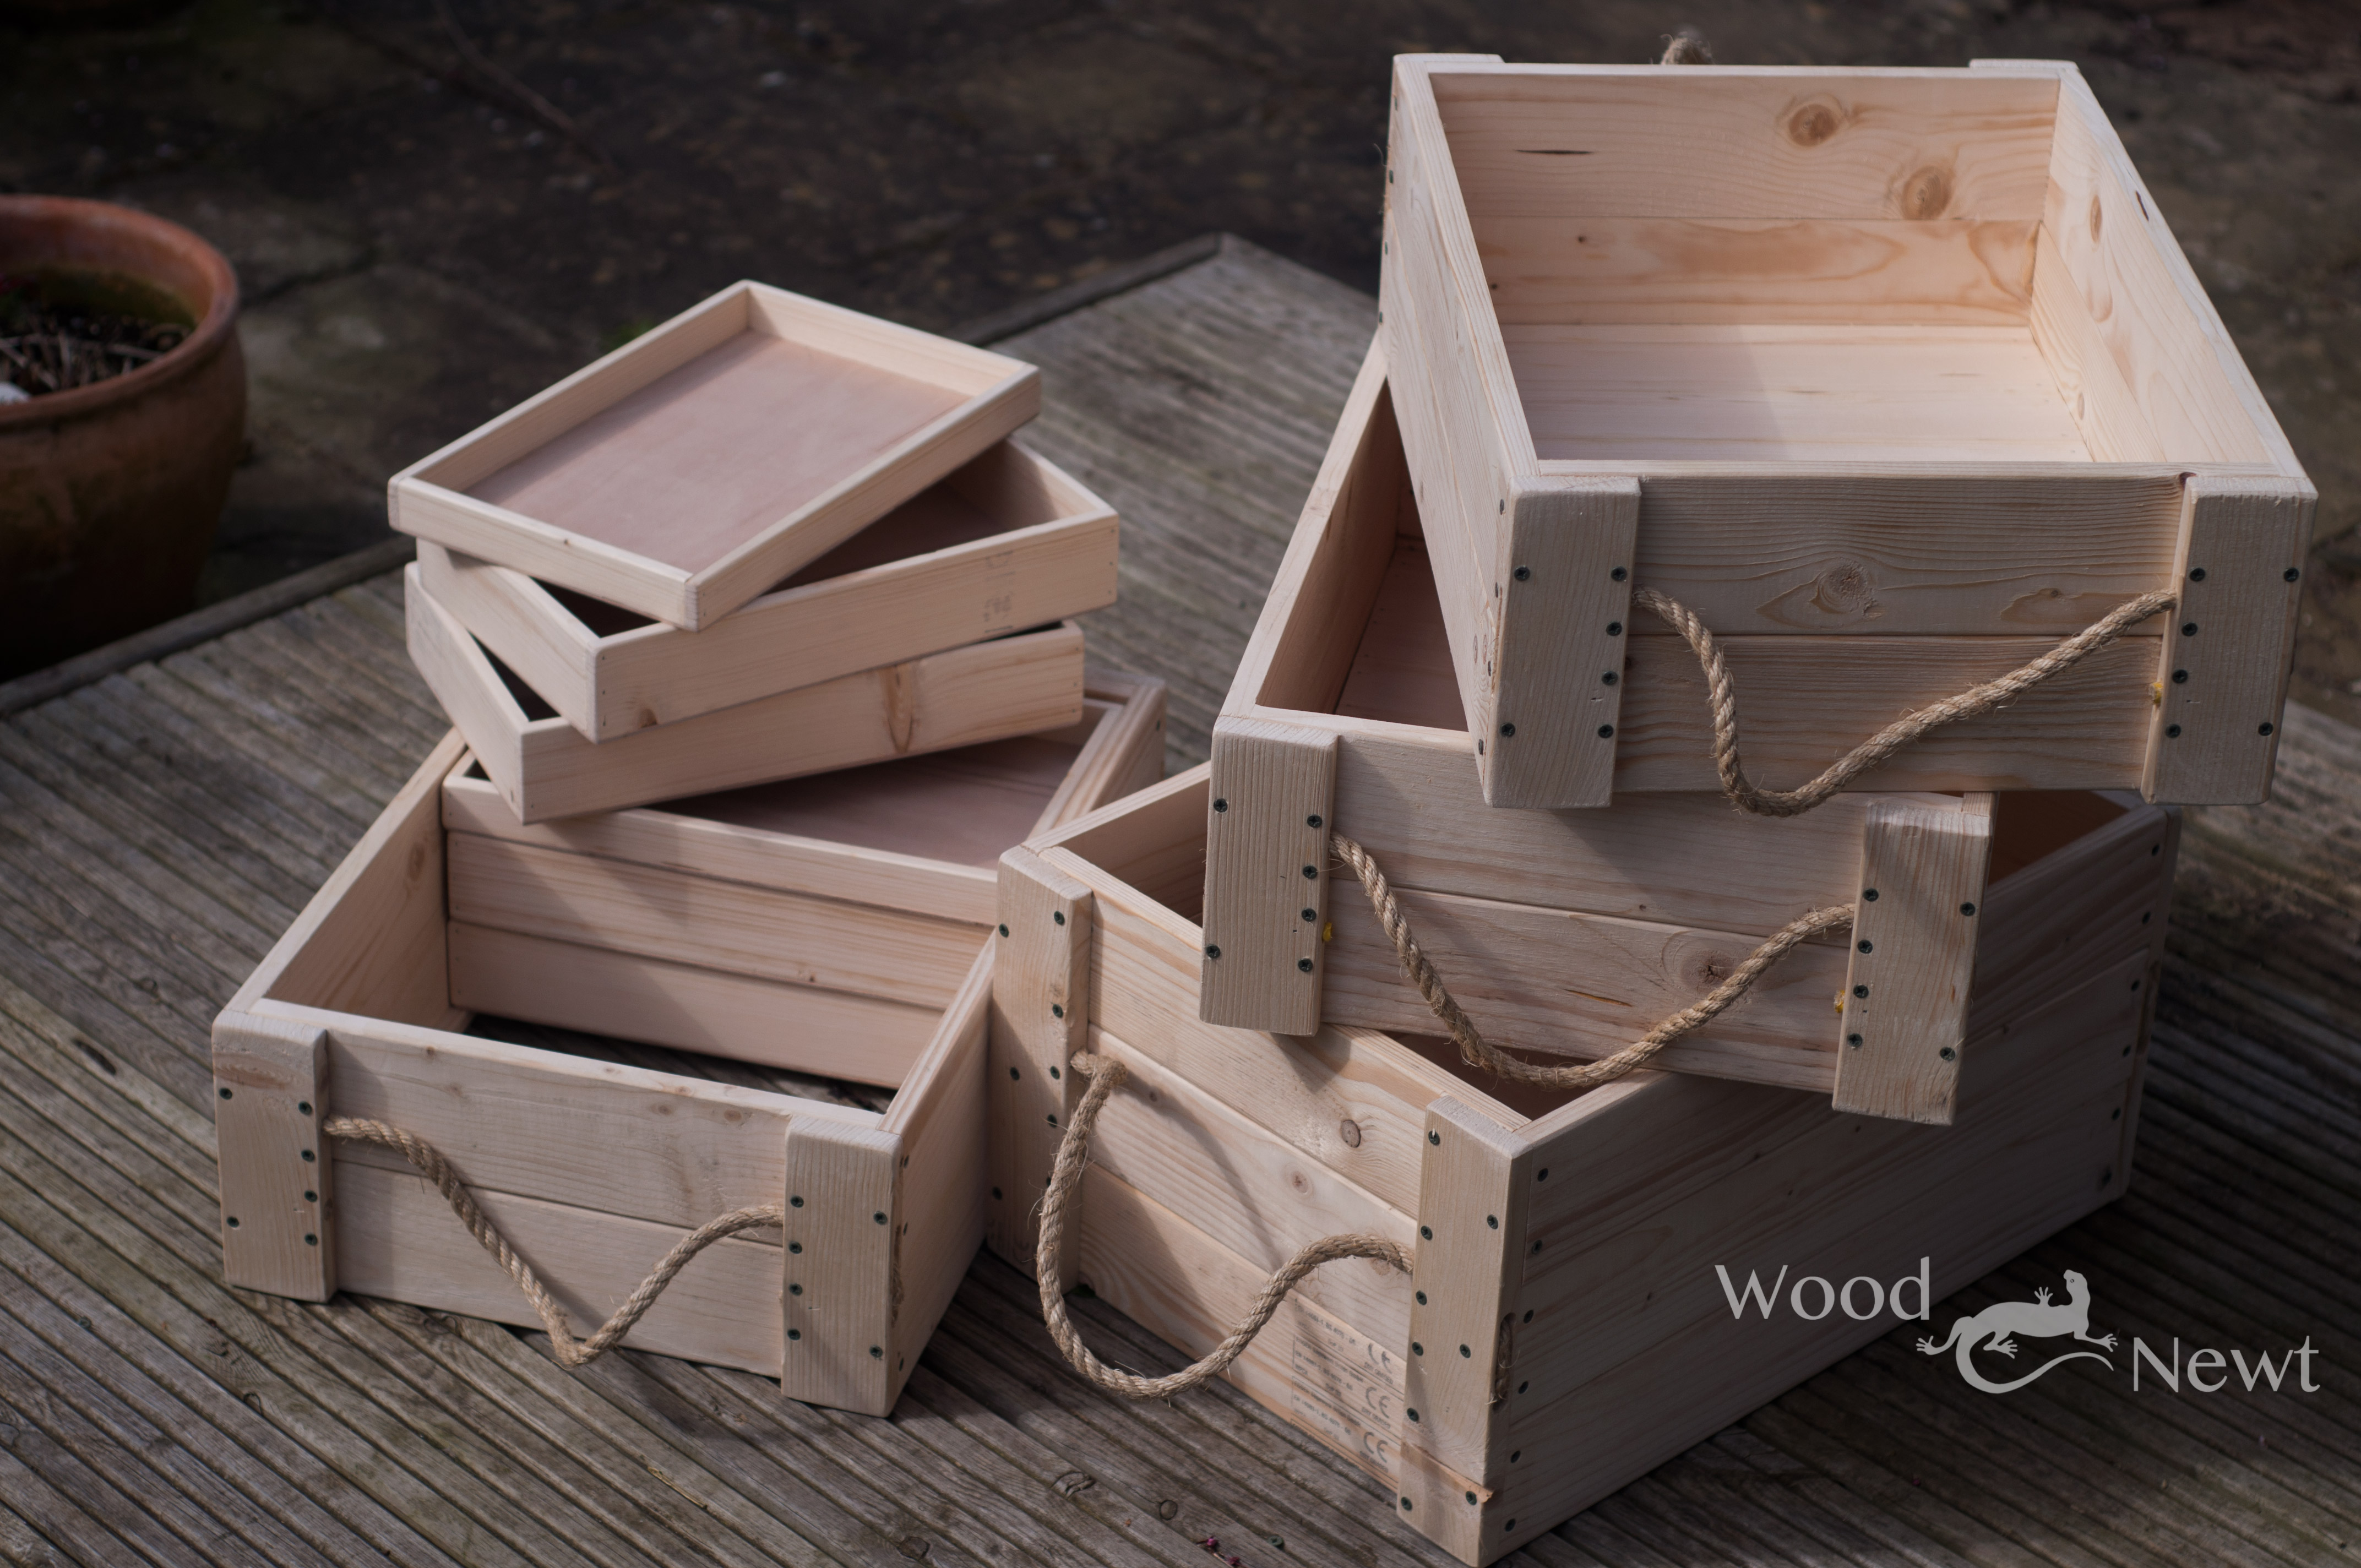
We discussed locations for their raised beds, height from the paved area, and a suitable width to allow comfortable gardening to to back of the beds.  The beds were constructed from decking boards, and lined with black polythene to resist rot from moisture, and then to protect the polythene from cuts and tears from gardening tools, I used an additional lining of tough weed suppressant membrane over that.

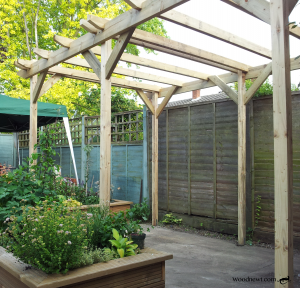
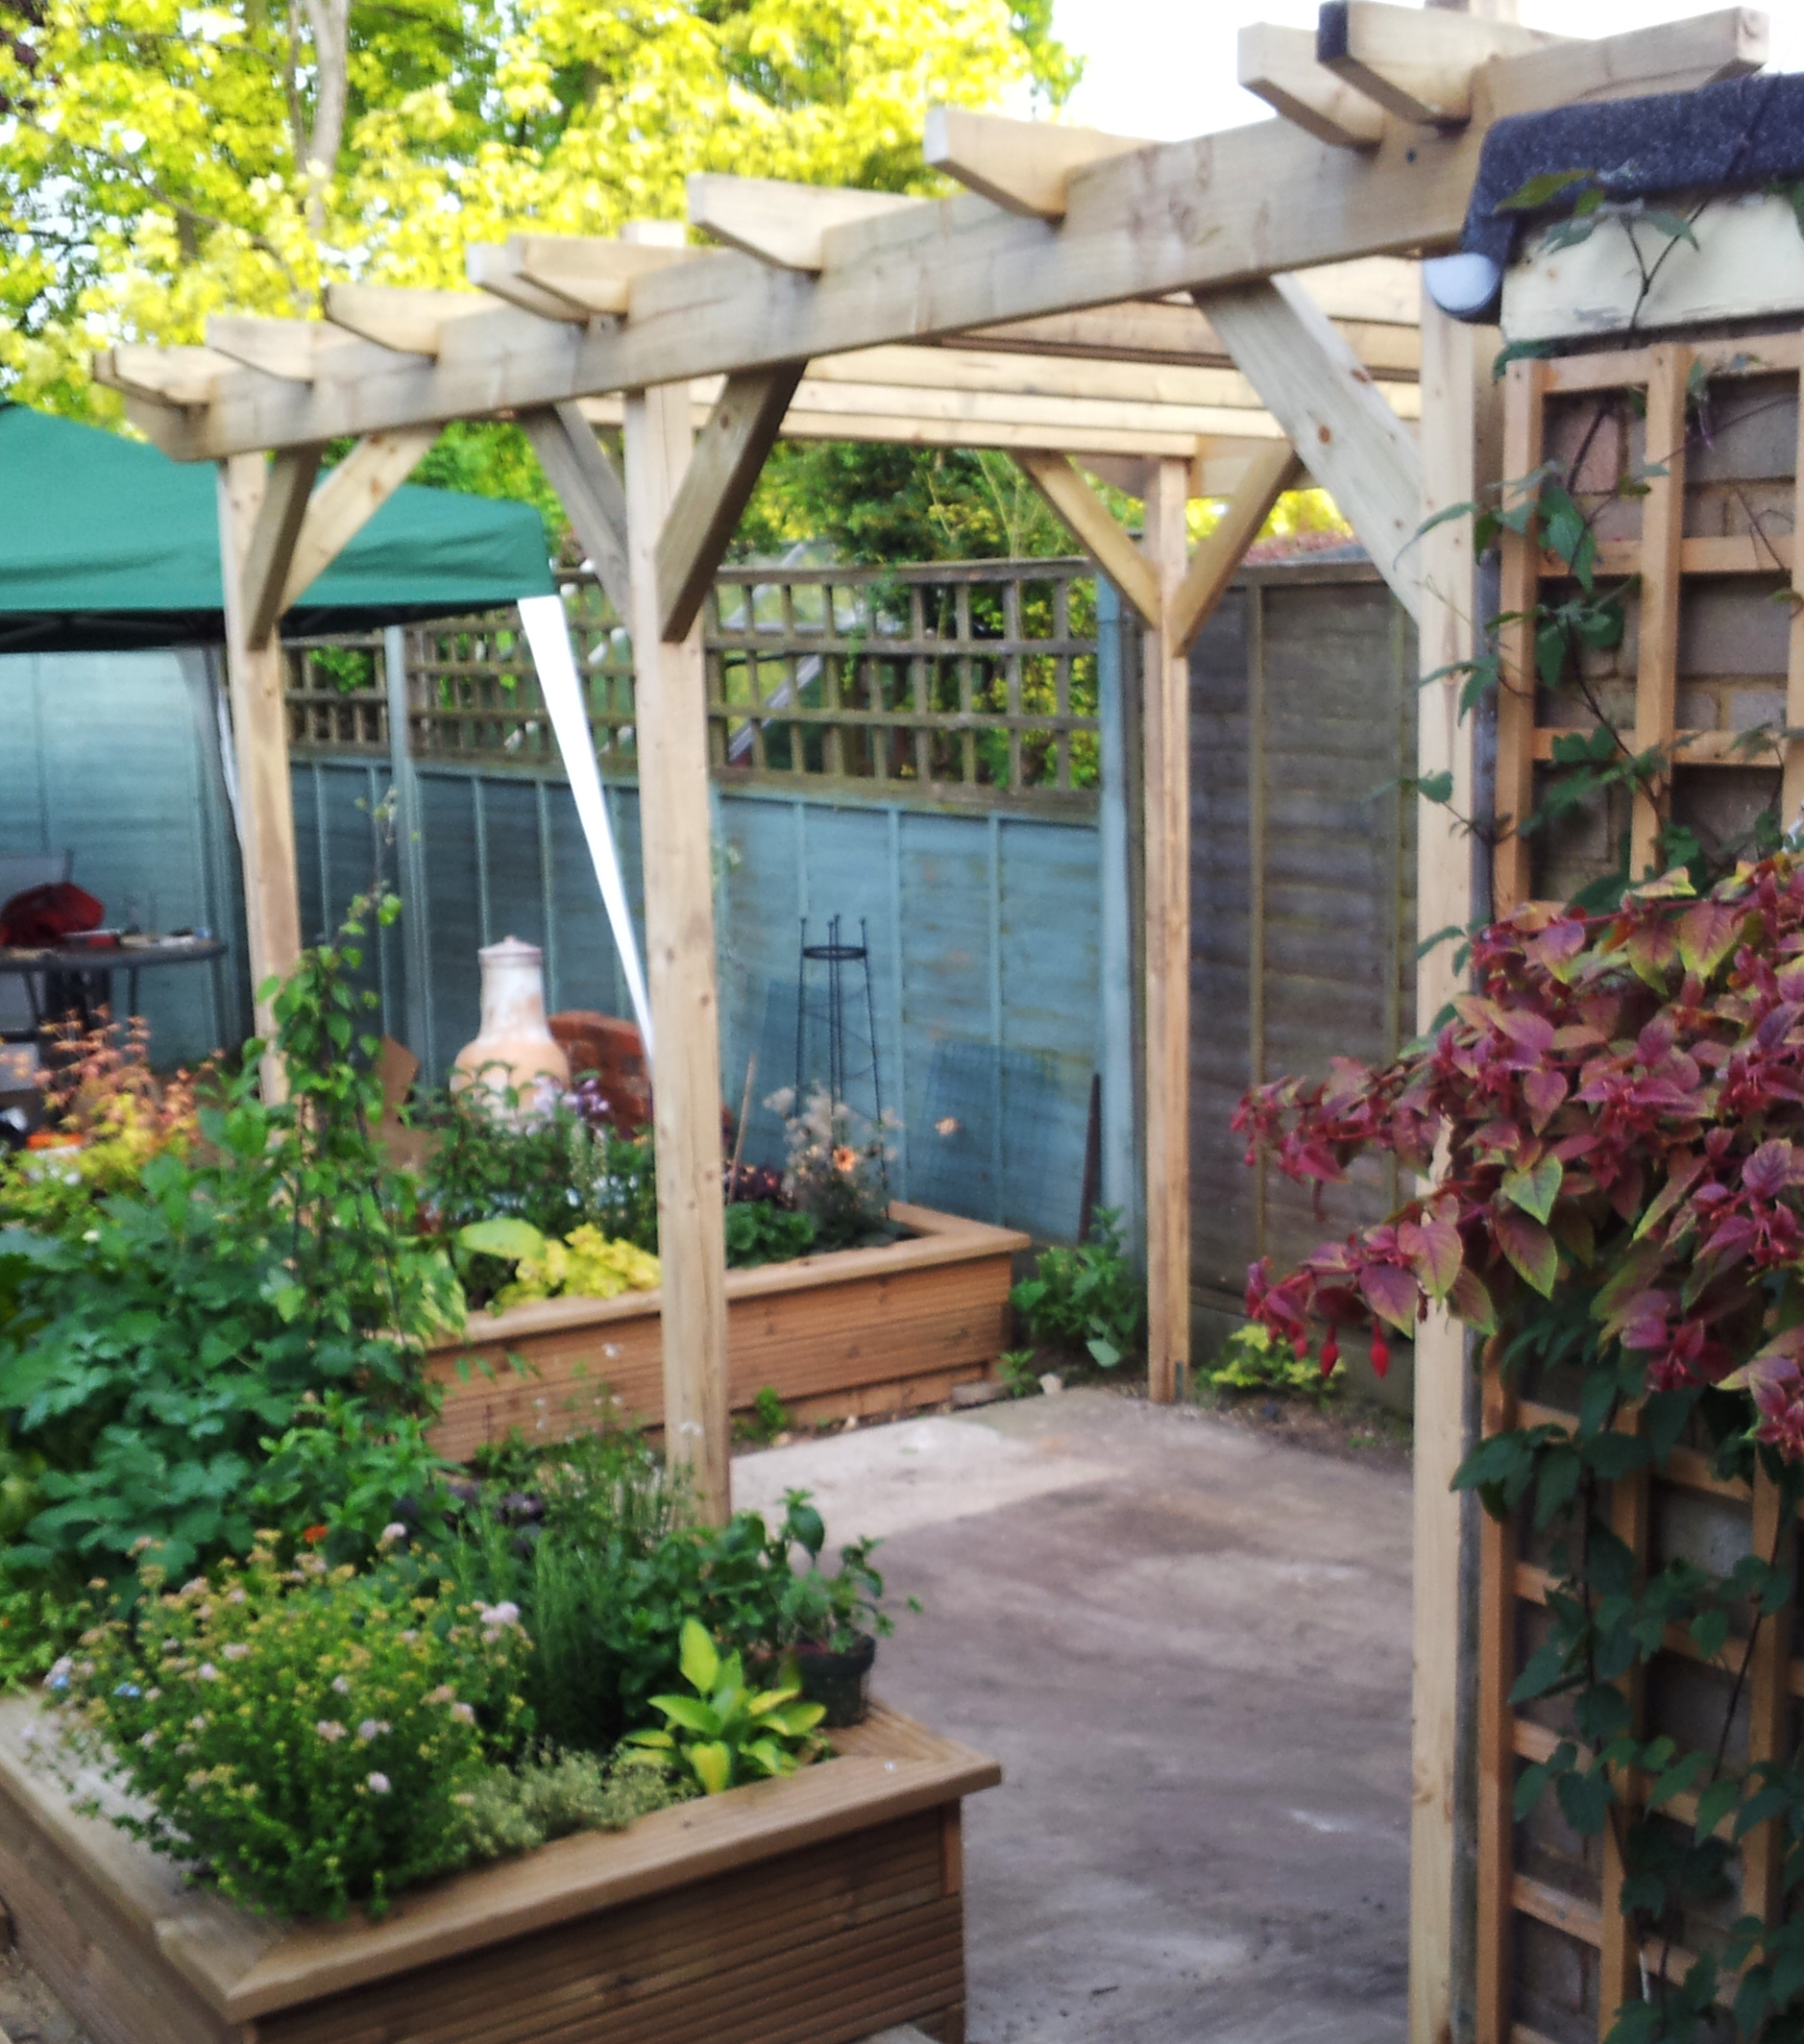
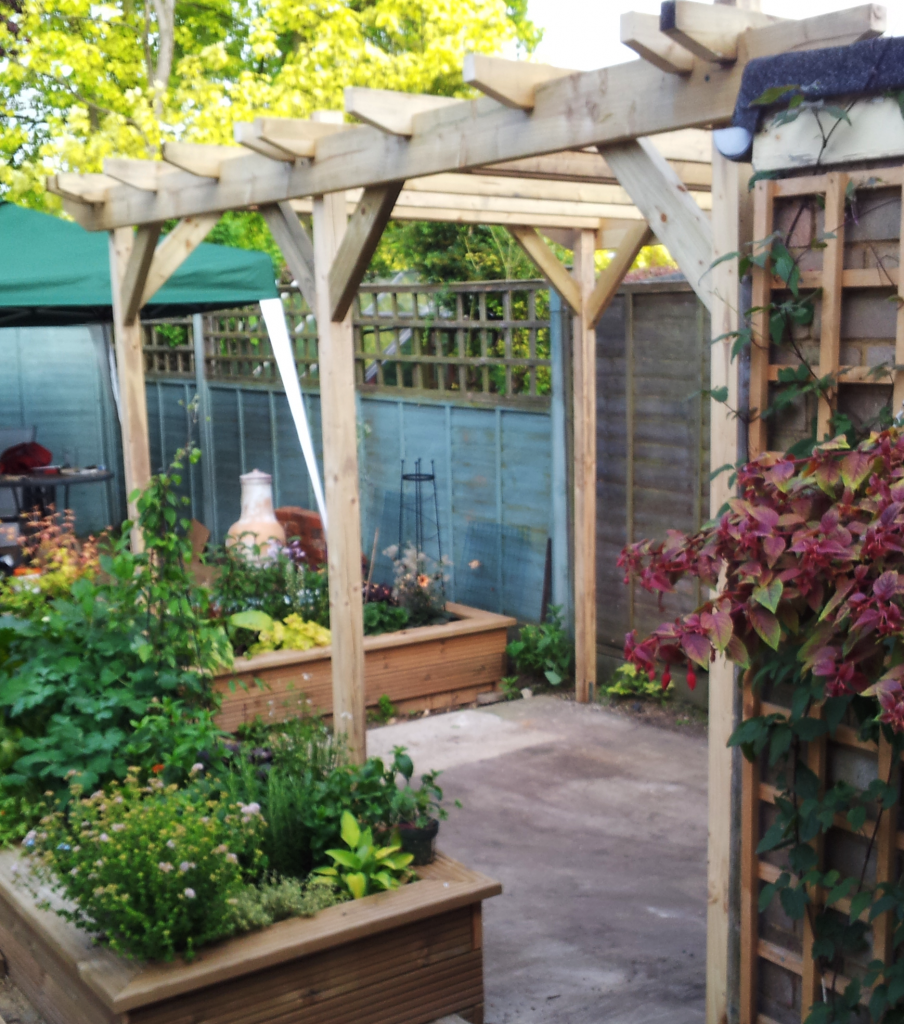
As well as low level planting, climbers were desired for higher level foliage and flowers, and to help the concrete apron to be shielded from general view. The apron would be useful for gardening tasks and the like, and therefore was nice to have this space available for occasional use.

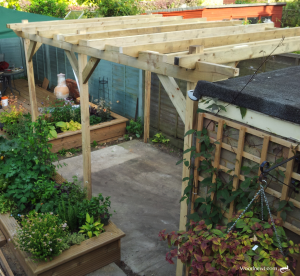
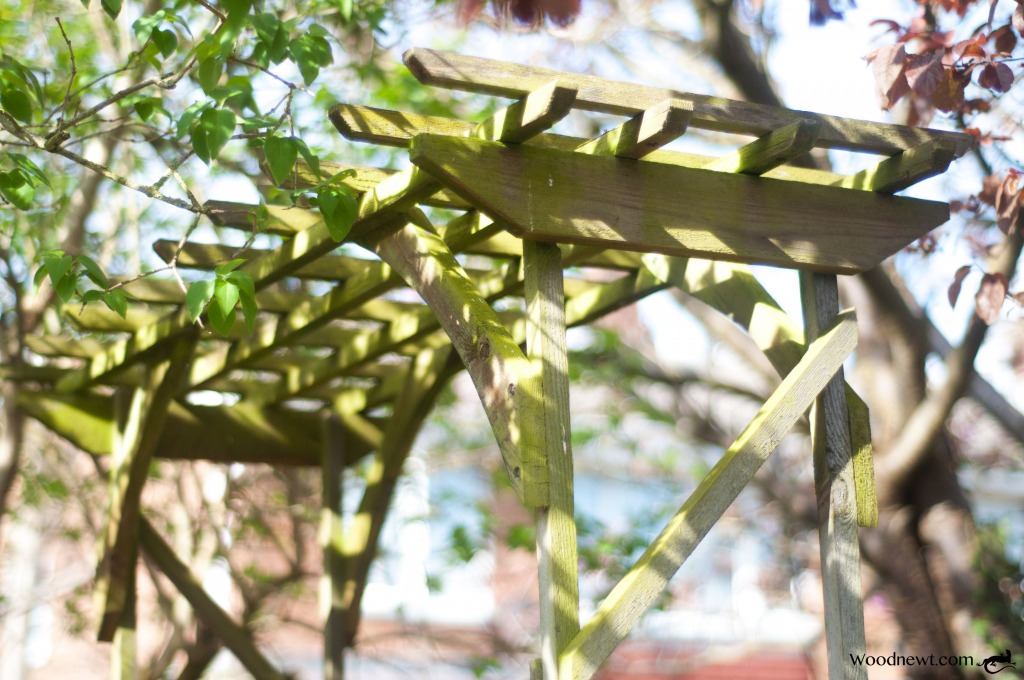
With a plan to have a raised bed installed on the two available edges of the apron, having a structure to support climbers from both of those beds seemed a good idea. I suggested a pergola. A pergola is a garden feature forming a shaded walkway, passageway, or sitting area of vertical posts or pillars that usually support cross-beams and a sturdy open lattice, often upon which woody vines can be trained. I designed and manufactured this to specifically fit the apron.

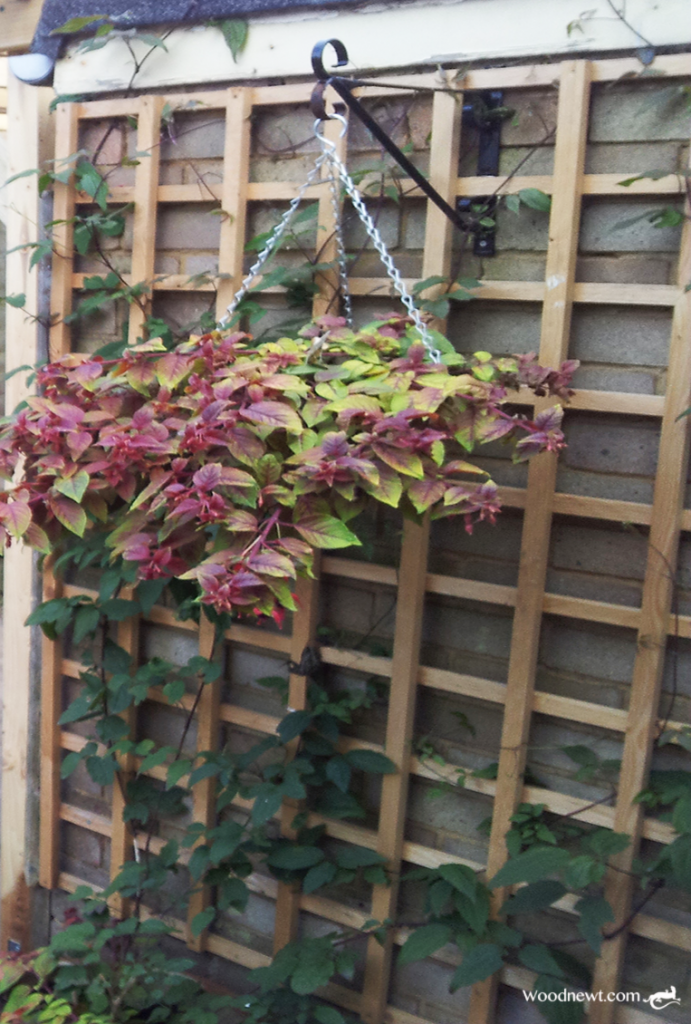
Having two brick walls as available space for climbers, led to the suggestion of trellis being made and fitted. The trellis was chunky and long lasting made from 1” x 1” treated timber.

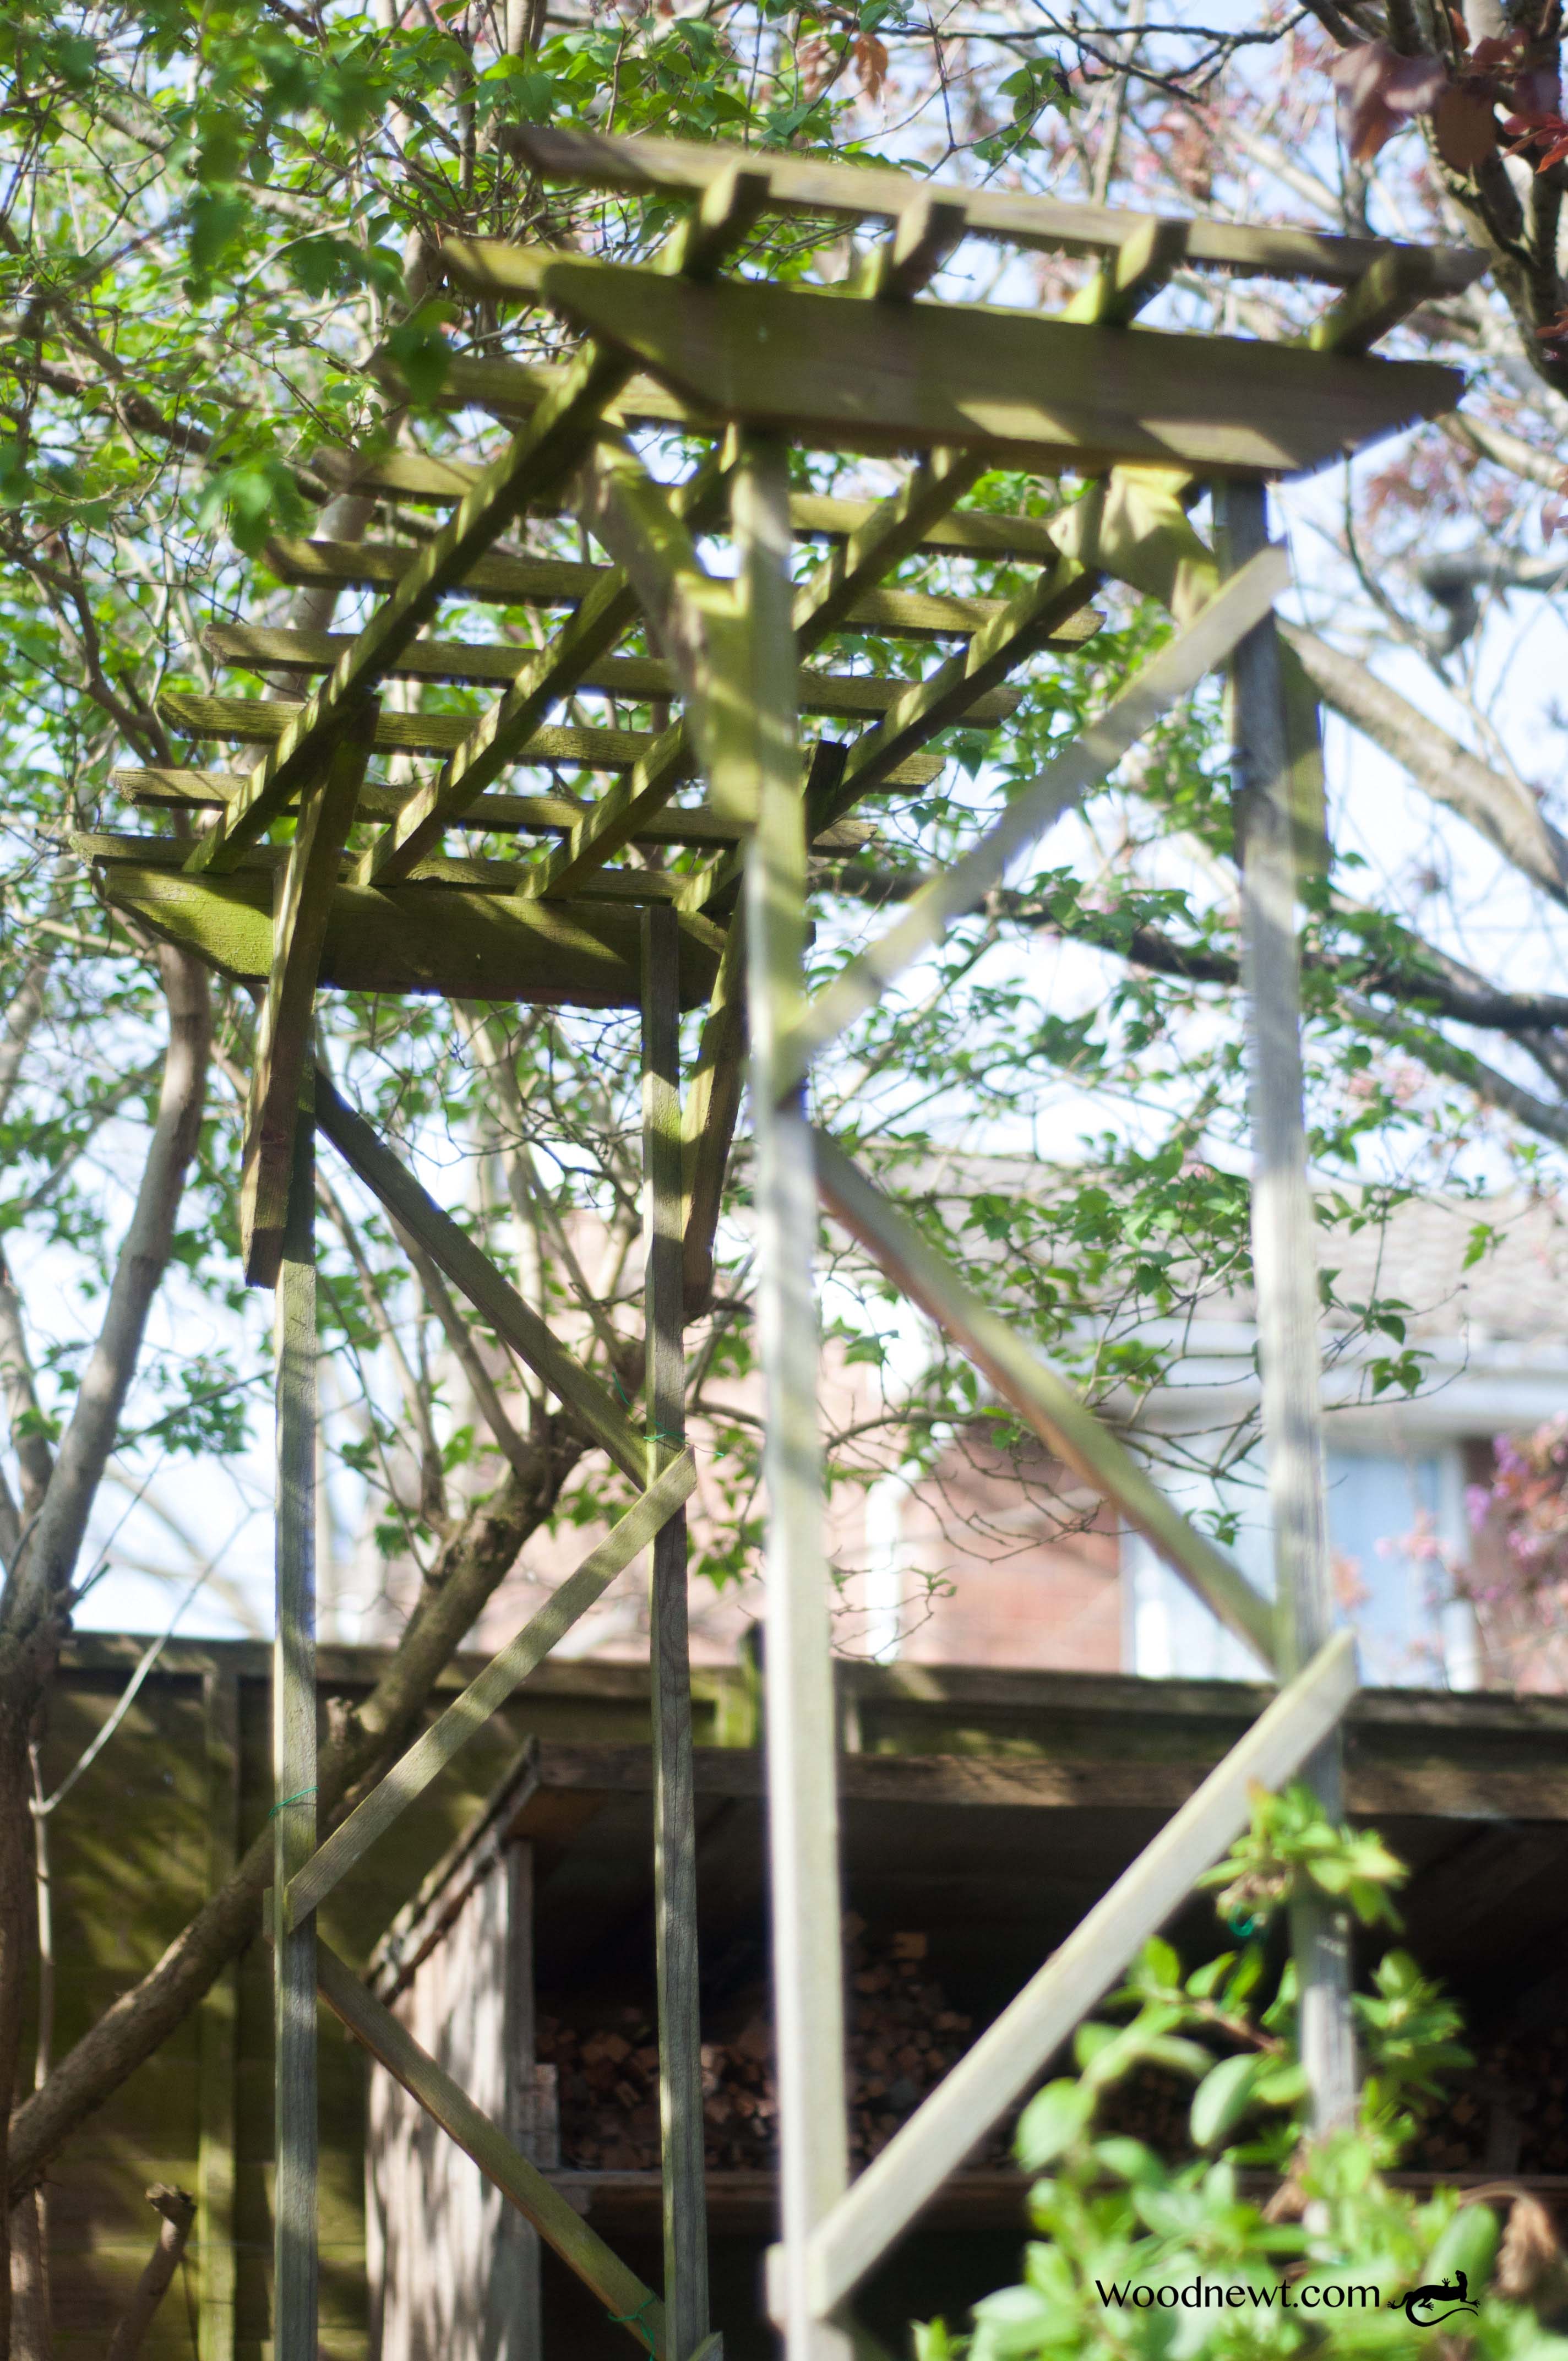
The rose arch was designed with a delicate feel to it, as it is located in a shaded area beneath trees, it is made from pallet wood, and with diagonal bracings for strength.

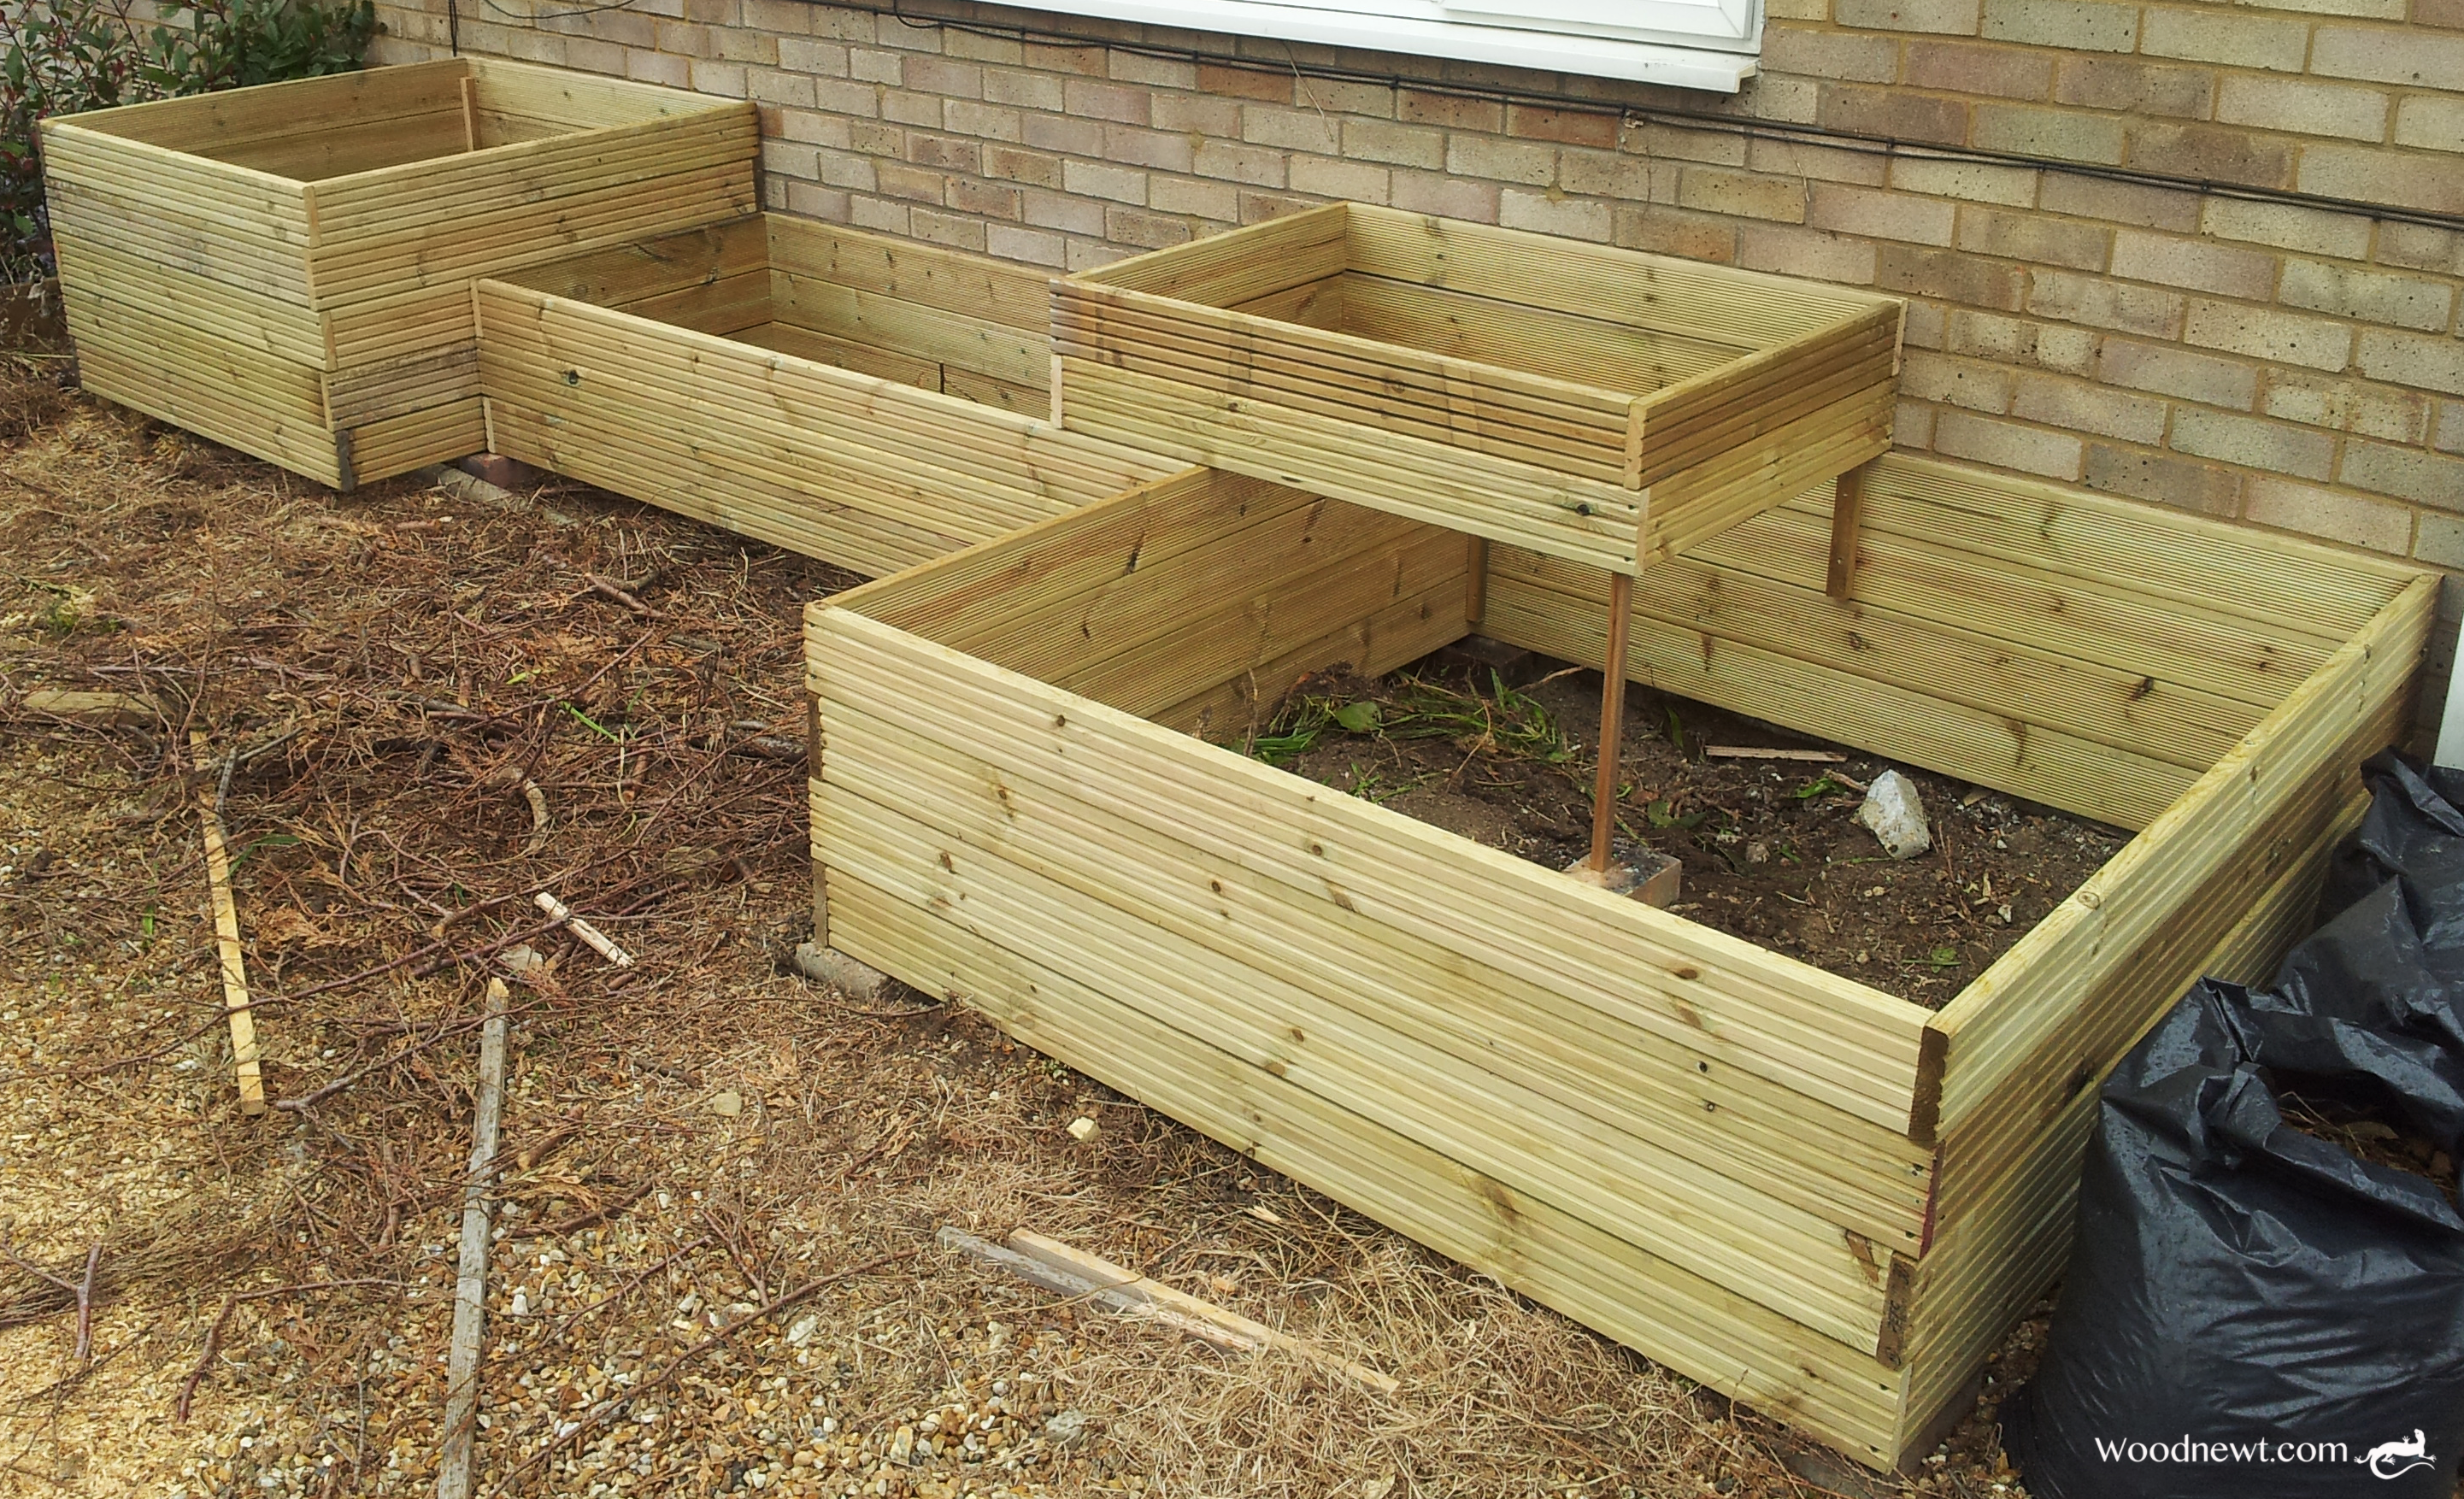
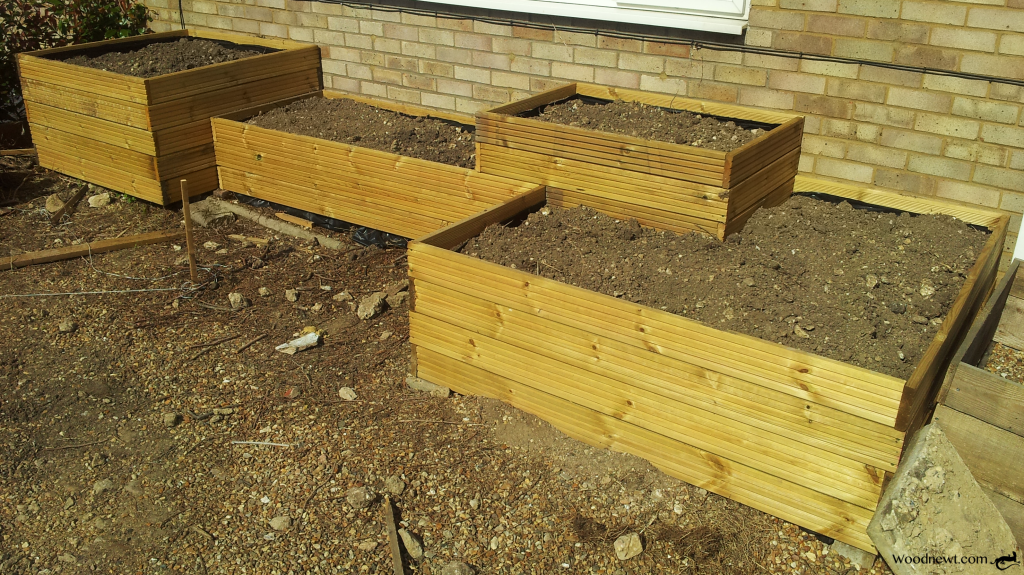
The front garden was being remodelled to include a parking bay, and  several options were discussed. A set of tiered raised beds were designed in an ‘L’ shape and built for the available location beside the pavement and adjoining the neighbours boundary.  

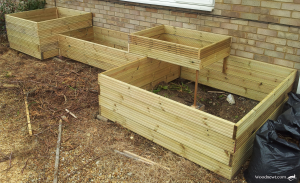
For in-front of the house, beds tiered with differing box sizes were  made. Like the beds at the rear of the house, these were built using deck-boards and lined with both black polythene and the weed suppressant membrane. 

I also made an additional two trellis for either side of the front facing window.

This scope now available for planting and growing in these spaces is awesome. Then to sit on the deck to enjoy their garden in all its splendour must be lovely.

Computer desk

Despite there being lots of styles and sizes of computer desks available to buy, sometimes what you want or need may not be available. after unsuccessful attempts to buy one, I was commissioned to design and make a desk to replace the one that was tatty and getting unstable. It had an open front for the computer base to sit in and the printer beside, the keyboard drawer no longer functioned. Brian’s family wanted to buy him a fathers day gift of a new desk, (it really was needed) after a day trawling the stores, either wrong materials (metal and glass) or wrong size (too big for the space), or simply wrong features, as he wanted doors on the front to stop the dog hairs from his dog brushing by getting into the printer.. which had recently failed due to that problem. I had a chat and also suggested a dedicated shelf for the amplifier, and extend the keyboard drawer for extra space for when needed.

The desk was made from a singe sheet of 4’ x 8’ 18mm birch plywood. I researched optimum seating positions for workstations and chatted with Brian to get the right solution that worked for him. As he listens to a lot of audio and watches media also, I suggested lifting the amplifier to a dedicated easy to access shelf.


There are different wood tones of features in the kitchen/diner,  a pine bookcase, pine tables and chairs, and beech/light oak kitchen units, I matched the colour to harmonise with all, The desk was stained and then a water based varnish used to seal and protect the desk in the kitchen environment. The keyboard drawer got extra coats due to the wear and tear it will receive.

The panel fixings are dowels and pocket hole screws, with the back being made from 6mm plywood screwed on giving added rigidity and to help seal the computer and printer space from dust and dog hairs. The keyboard drawer runs on 450mm full extension bearing glides which can easily take a 18kg load, (a lot more than the one it replaces), the doors are fitted using sprung cabinet hinges as per kitchen units. I fitted a drawer stop/lock giving a really solid feel to the desk/keyboard top when pulled out.  I like how this project turned out.

Wooden Art Crates

A request came in for some bespoke wooden stacking crates.   I was shown pictures of old wine crates and army issue ammunition boxes, with the customer looking for a mix between the two.

The function of the crates were for storage and transportation of art materials, for delivering art workshops at different locations. They needed to be able to be distributed in the boot of a car, and then be stacked in a relatively small footprint when stored.  

When on location, the desire was to spread trays of equipment from within the crates for attendees to access on the courses.

I chose to build with CLS (Canadian Lumber Standard) timber as the corners have already been ‘eased’ for use in construction situations.

The crate holding the trays did not require a solid base, instead using supporting battens for the trays to rest upon.

Garden chair re-fit

Some garden chairs had naturally come to the end of their 12yr life, with the plastic sling seat becoming brittle and ripping due to Ultraviolet light deterioration.   The steel chair frames, were still in reasonably good shape. 

With a bit of thought, a re-design, a few stainless steel screws, a tin of paint, and wood ripped from 3” x 2” CLS timber, the project began.

 The chair on the left is a surviving chair.. looking rather tired after 12 years sitting in a garden exposed to the elements.

The chair in the middle is part finished, the frame was dis-assembled, re-painted, and re-assembled, I secured the seat slats using stainless steel self tapping pan head screws and the screw holes were finished with wooden plugs glued into the screw holes.

The chair on the right is fully finished, sanded down and stained with weatherproof treatment.

The paint used was a weather resistant smooth metal black paint.

Once complete, the homeowner took joy being seated beside a chiminea with its warm and mellow glow, along with drinks on their deck.

Paper folders

I had a request to make some ‘bone’ folders. Traditionally these are made from bone, but are often made from wood or plastic.

A bone folder is a dull-edged hand tool used to fold and crease material in crafts such as bookbinding or card making, it may also be used for burnishing a ‘rub on’.

A requirement for about twenty were needed for children’s crafting workshops.   A top quality bone version wasn’t required, so I machined and hand finished these from scrap timber I had in my workshop.   I have since been informed that they work well, and the children have had great fun creating their own handmade books.

Cottage style shelving

Country Cottage Shelving

This project started out as ‘can we have some shelves fitted  in the kitchen’.

After chatting with the homeowner,  I suggested different style options available to them.  depending on the function required, and the final aesthetics.  Following our discussions I suggested two pairs of chunky shelves on each side of the kitchen to suit their wall lengths, these would be supported by cast iron brackets.

Iron Bracket
Iron Bracket

As they were unsure of wood colour shades, I created some samples. the shelf boards were stained a light oak shade, and then due to the location, sealed using a water based satin varnish. The cast iron brackets were sourced on the internet.

Shelf


Partway through the project, an additional single shelf was asked for, along with the installation of a clothes airer.  We only had one bracket remaining so I manufactured two chunky feel battens as supports.


I was additionally asked to fit the matching clothers airer that is suspended from the ceiling, the whole kitchen has been transformed


Wood Newt has a new web presence!

I have received assistance in getting the Wood Newt website online.   I will share projects here that I have designed and manufactured for others, that help make their homes more beautiful, and a joy to live in.

I will also be adding posts about new services, and my own design projects.

I hope you enjoy your visit to my site.

Brian..   The Wood Newt.